
Install OpenVPN on GL-iNet router
The majority of consumer routers are too weak to handle the encryption algorithm that we provide.
If you wish to get better internet speed than 10-20 Mbit/s, we recommend the Vilfo's VPN router.
1. Download the configuration you want
2. Configure OpenVPN
Navigate to VPN → OpenVPN Client
Click on +Add a new OpenVPN Configuration
A new window will appear. Click-and-drag the configuration file you downloaded in the previous step into the window, or click in the window and select the file manually.
Once you have uploaded the configuration file, three new fields will appear. Enter a Description of the connection, as well as your OVPN Username and Password.
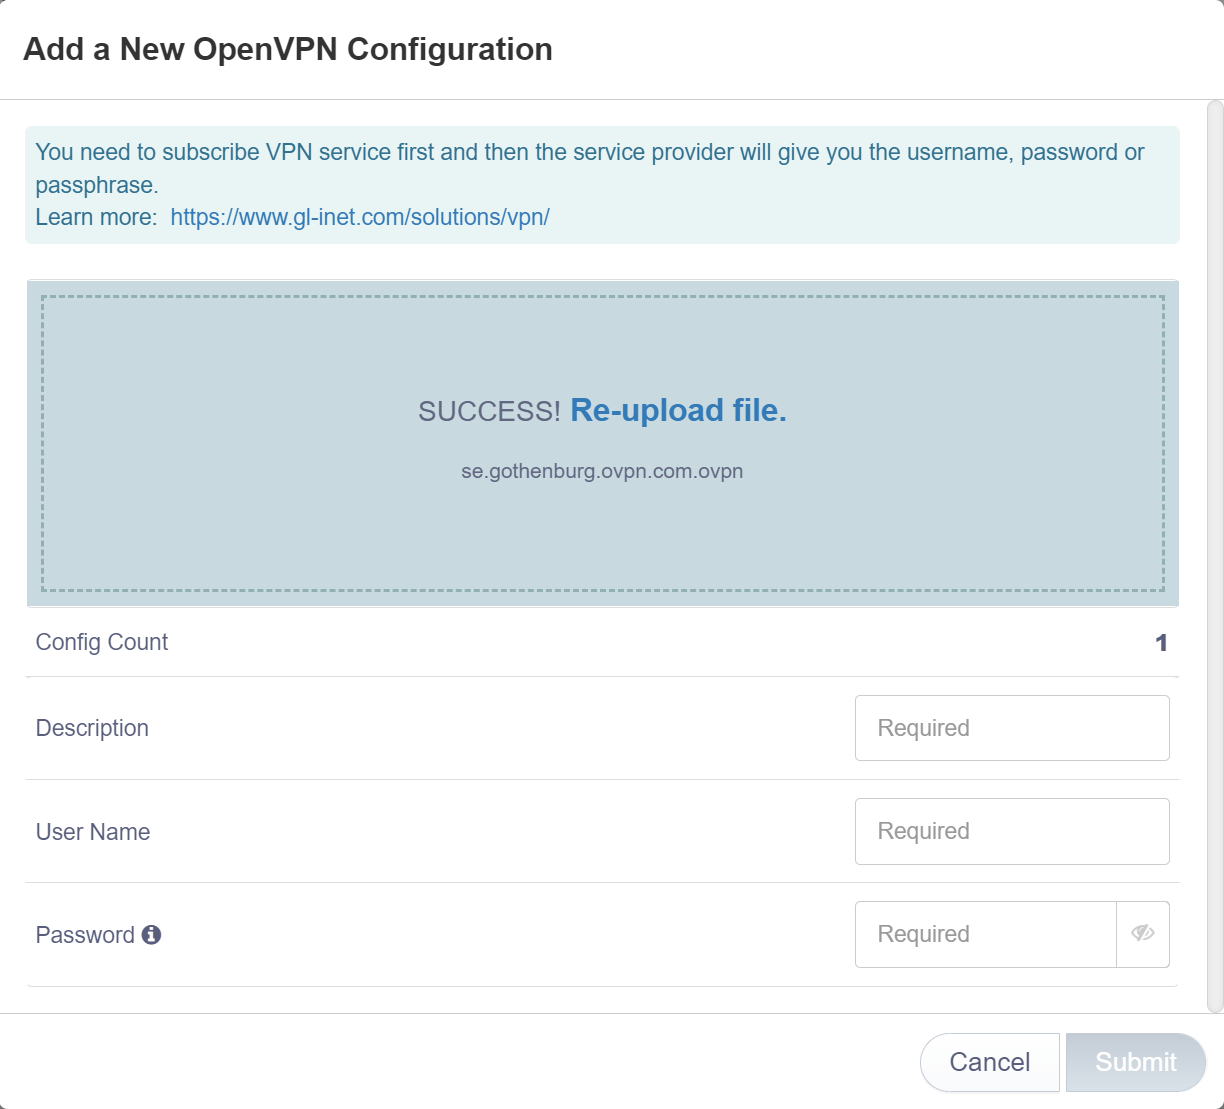
Click on Submit
Why OVPN?
OVPN is a court-proven VPN service that offers secure internet without country or streaming restrictions, and where ads no longer track your every move.
Learn more3. Change DNS servers
Navigate to More settings → Custom DNS Server
Make sure DNS Rebinding Attack Protection is enabled
Make sure Override DNS Settings for All Clients is enabled
Make sure DNS over TLS (CloudFlare or NextDNS) is disabled
Make sure Dnscrypt-Proxy Settings is disabled
Make sure Manual DNS Server Settings is enabled
In the DNS1 Server1 and DNS Server2 fields, enter the following information:
- 46.227.67.134
- 192.165.9.158
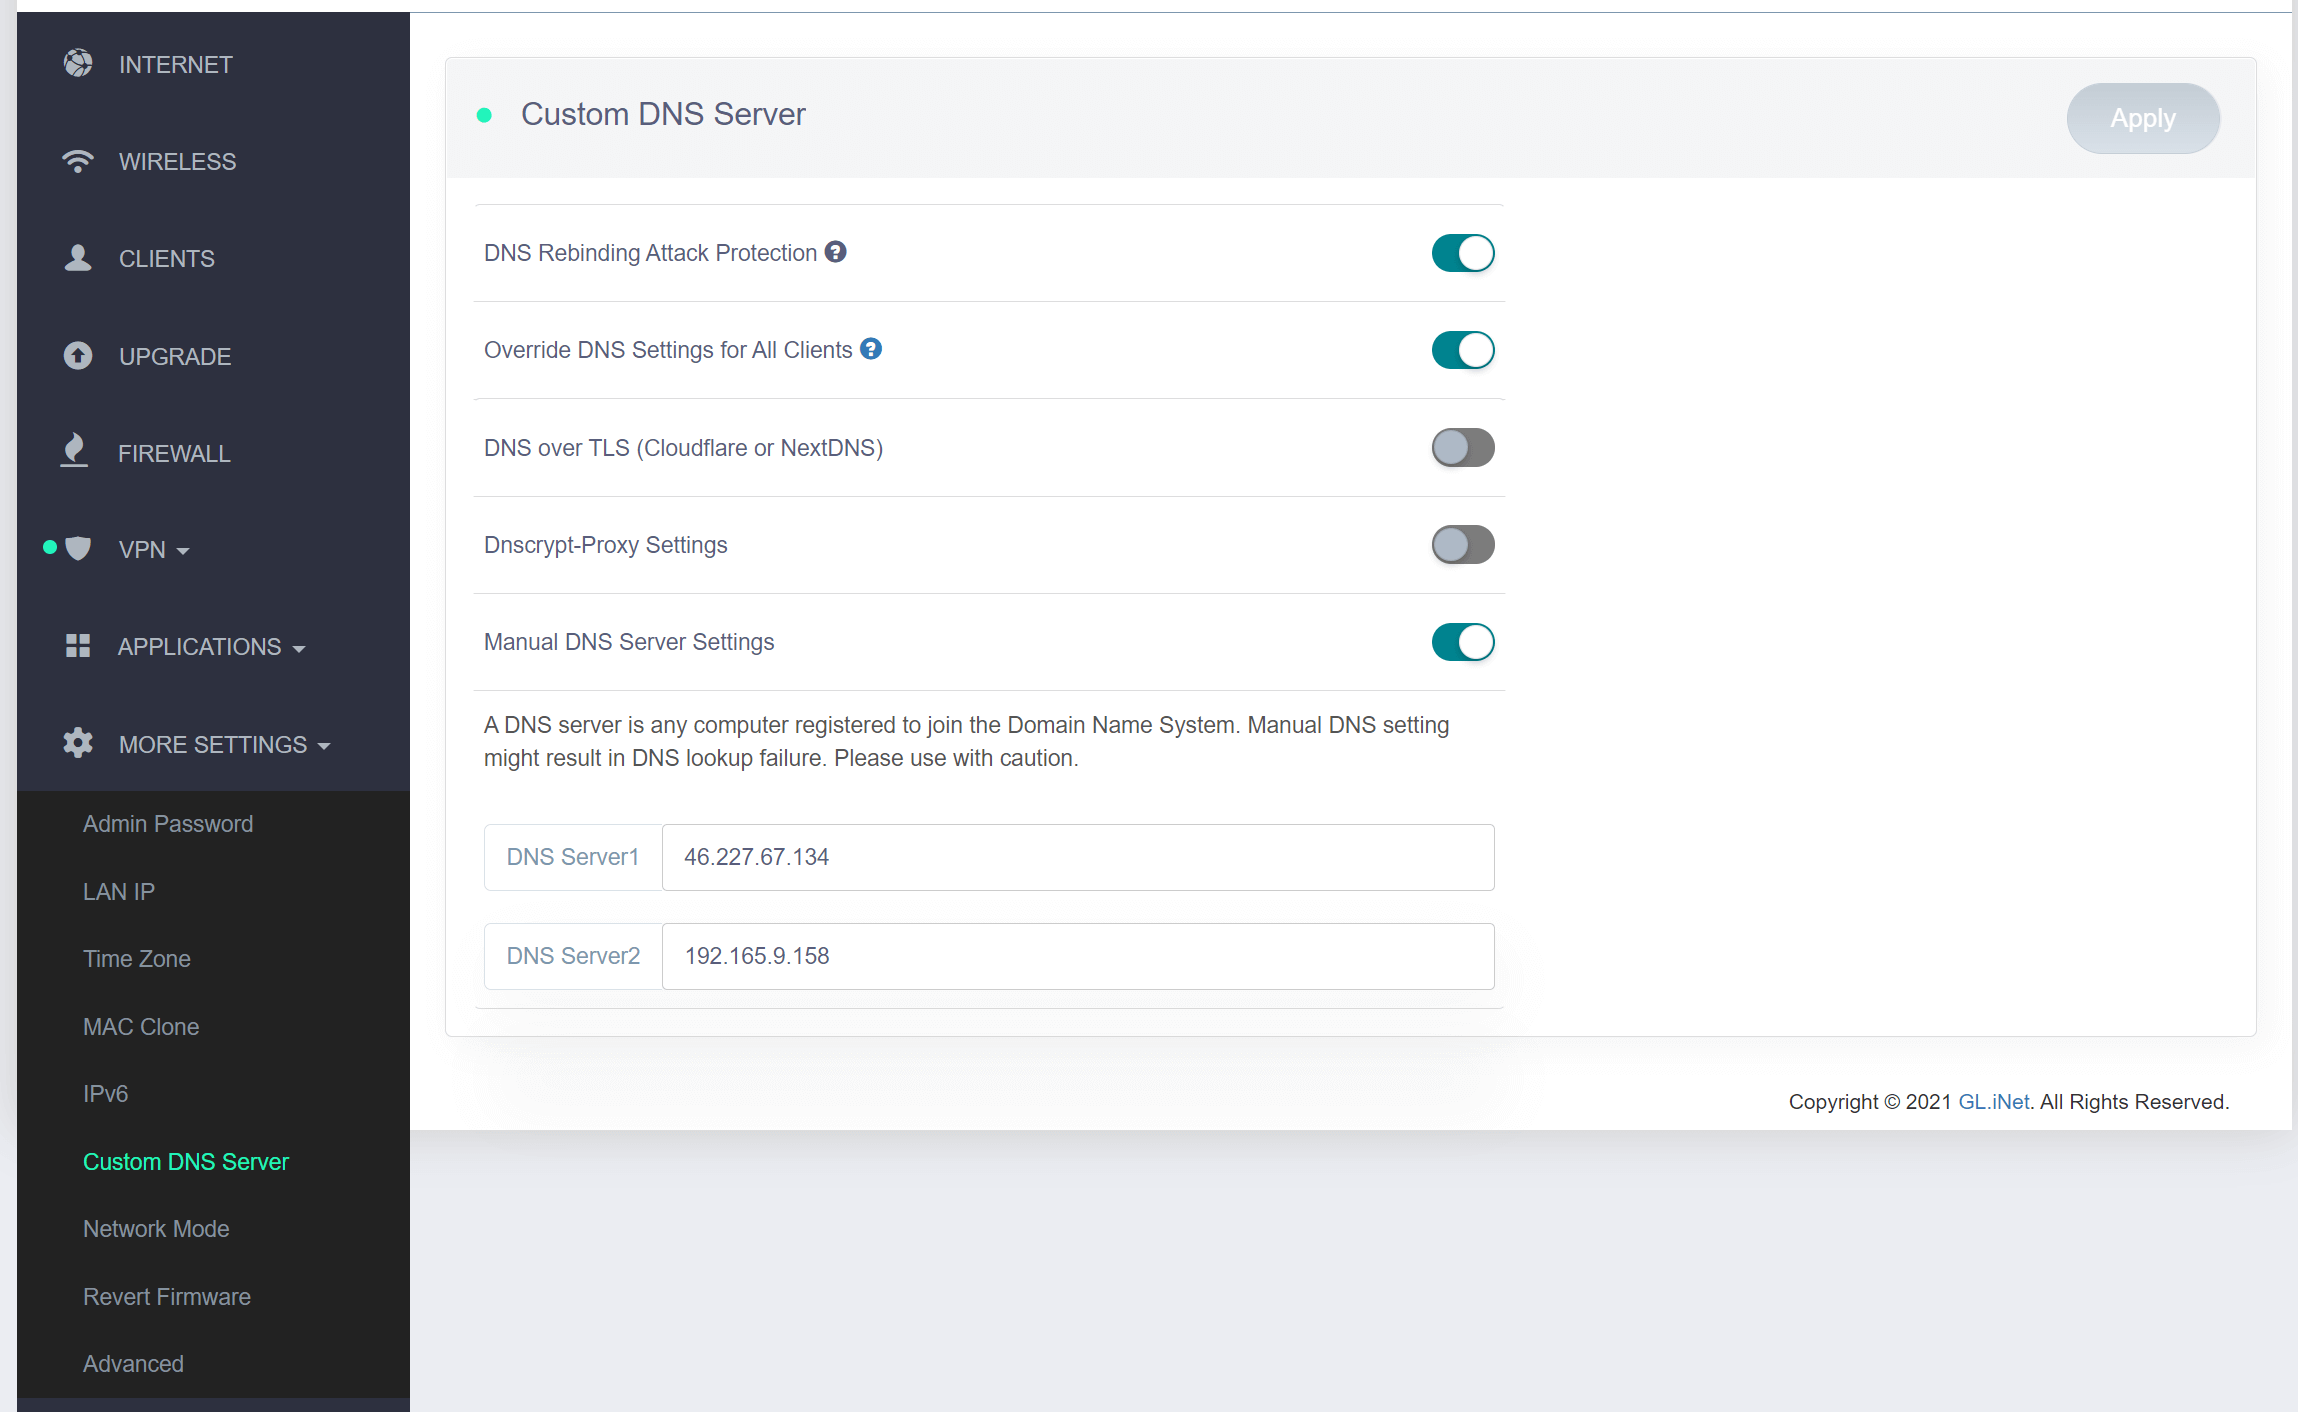
Click on Apply
4. Connect to OVPN
Navigate to VPN → OpenVPN Client
To connect, select the OpenVPN profile you configured in step 2 and click Connect
If everything went well, an IP address should appear in the IP Address field, and the status of the OpenVPN Client should turn green. 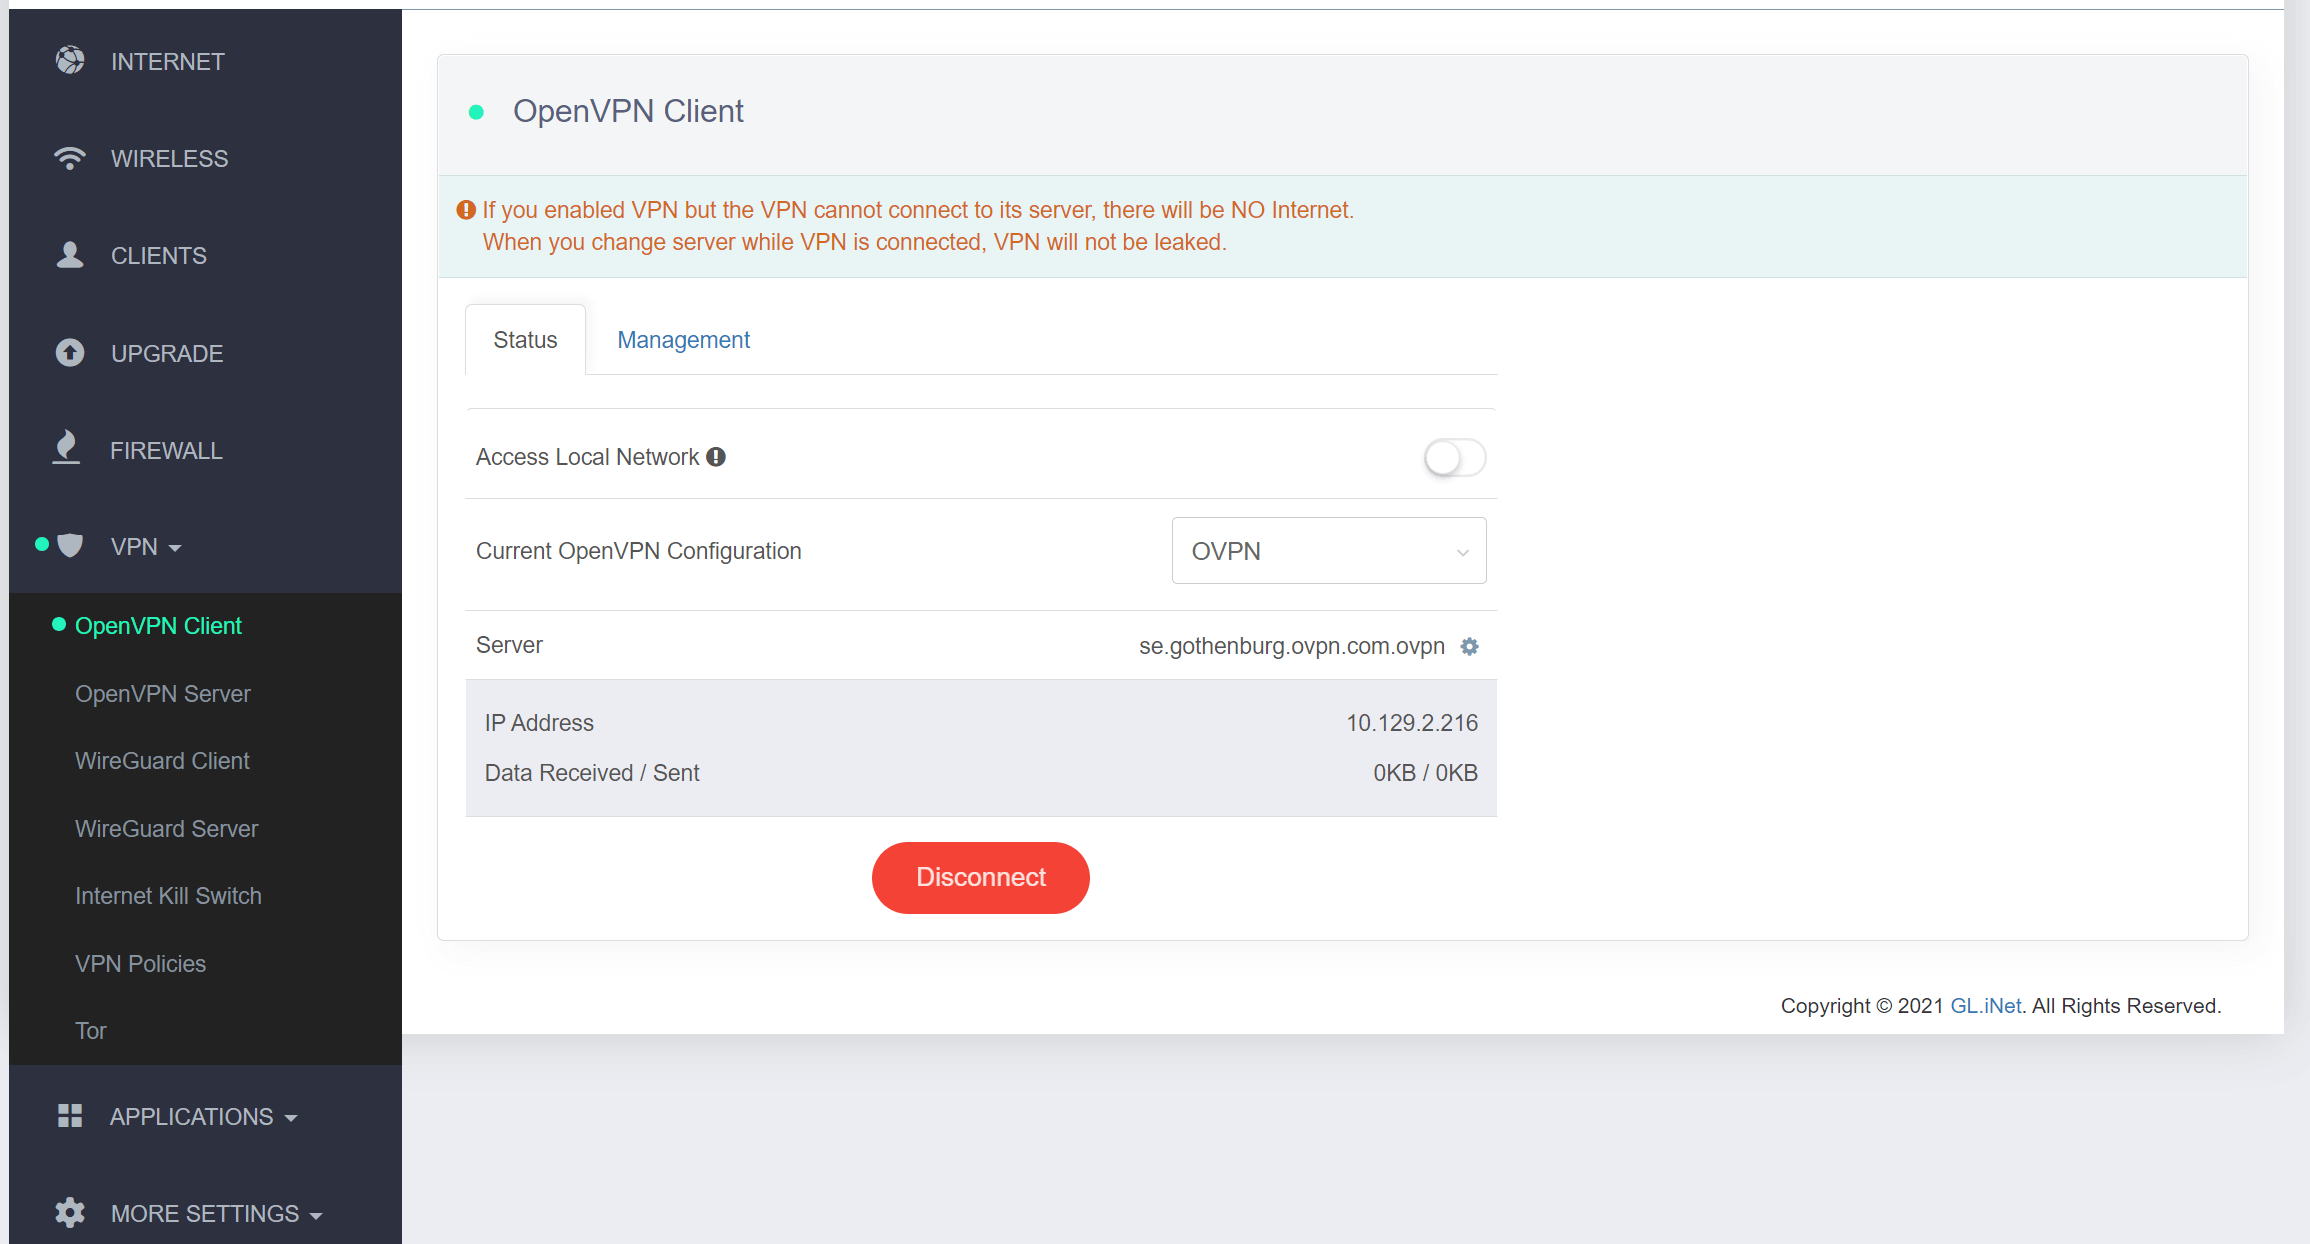
5. Verify that the connection was successful
You should now be connected to OVPN and be able to browse the internet safely. To make sure everything was set up correctly, please check the dashboard to verify that you are connected.