
Install OpenVPN on GL-iNet router
De fleste forbrukerrutere er for svake til å håndtere krypteringsalgoritmen som vi tilbyr.
Hvis du ønsker å få bedre internetthastighet enn 10-20 Mbit/s, anbefaler vi Vilfo's VPN-ruter.
1. Last ned konfigurasjonen du ønsker
2. Configure OpenVPN
Naviger til VPN → OpenVPN Client
Click on +Add a new OpenVPN Configuration
A new window will appear. Click-and-drag the configuration file you downloaded in the previous step into the window, or click in the window and select the file manually.
Once you have uploaded the configuration file, three new fields will appear. Enter a Description of the connection, as well as your OVPN Username and Password.
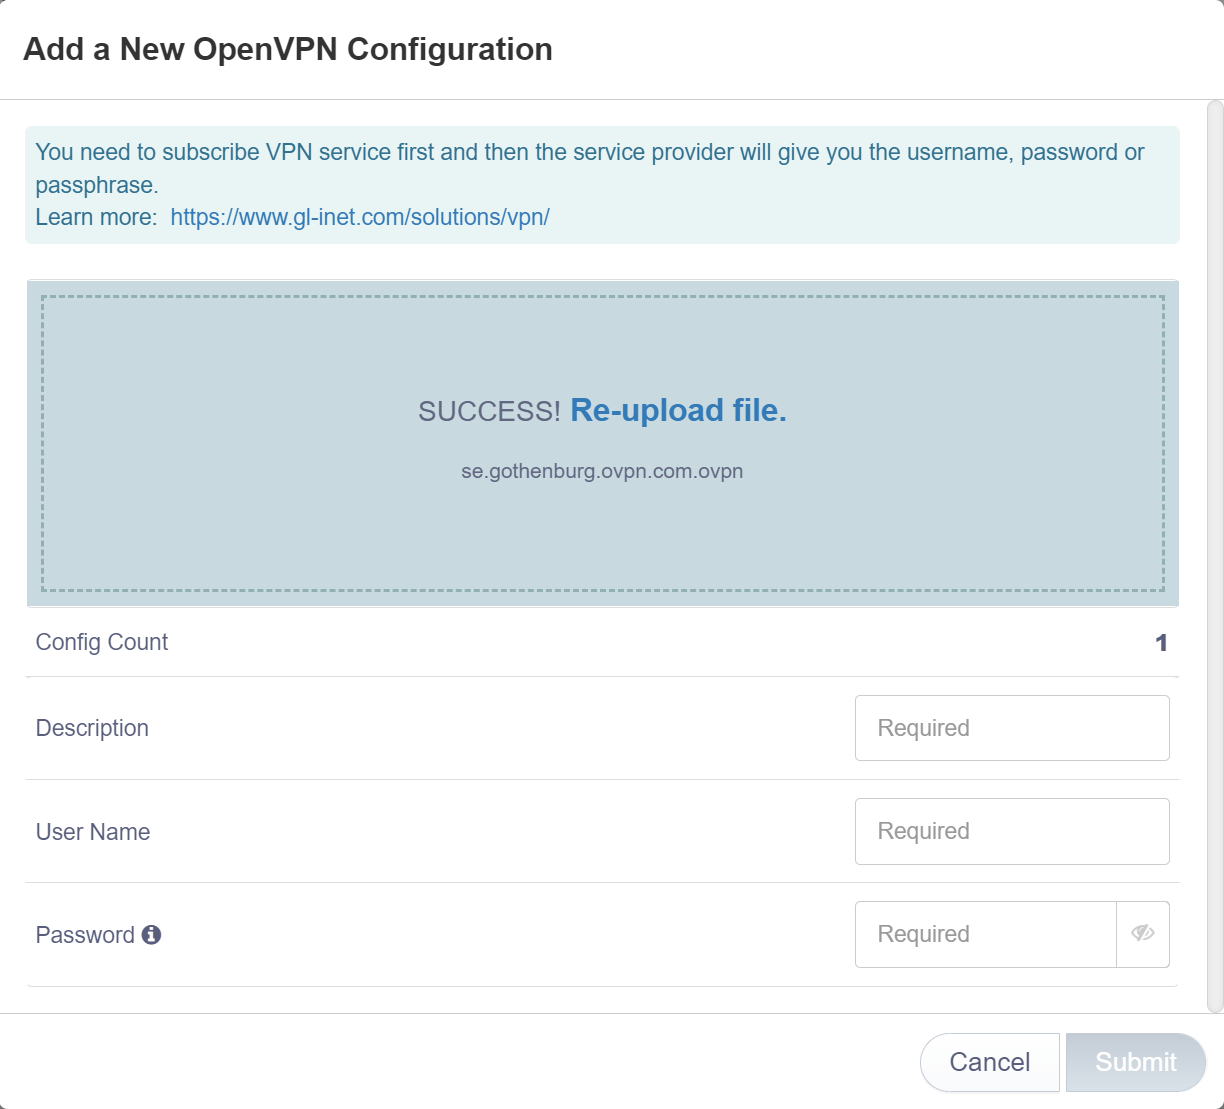
Click on Submit
Bruk OVPN hvis sikkerhet er viktig
Ditt personvern og din sikkerhet er hovedfokus i OVPN. Derfor har vi implementert en flerlags sikkerhetsmodell.
Learn more3. Change DNS servers
Naviger til More settings → Custom DNS Server
Make sure DNS Rebinding Attack Protection is enabled
Make sure Override DNS Settings for All Clients is enabled
Make sure DNS over TLS (CloudFlare or NextDNS) is disabled
Make sure Dnscrypt-Proxy Settings is disabled
Make sure Manual DNS Server Settings is enabled
In the DNS1 Server1 and DNS Server2 fields, enter the following information:
- 46.227.67.134
- 192.165.9.158
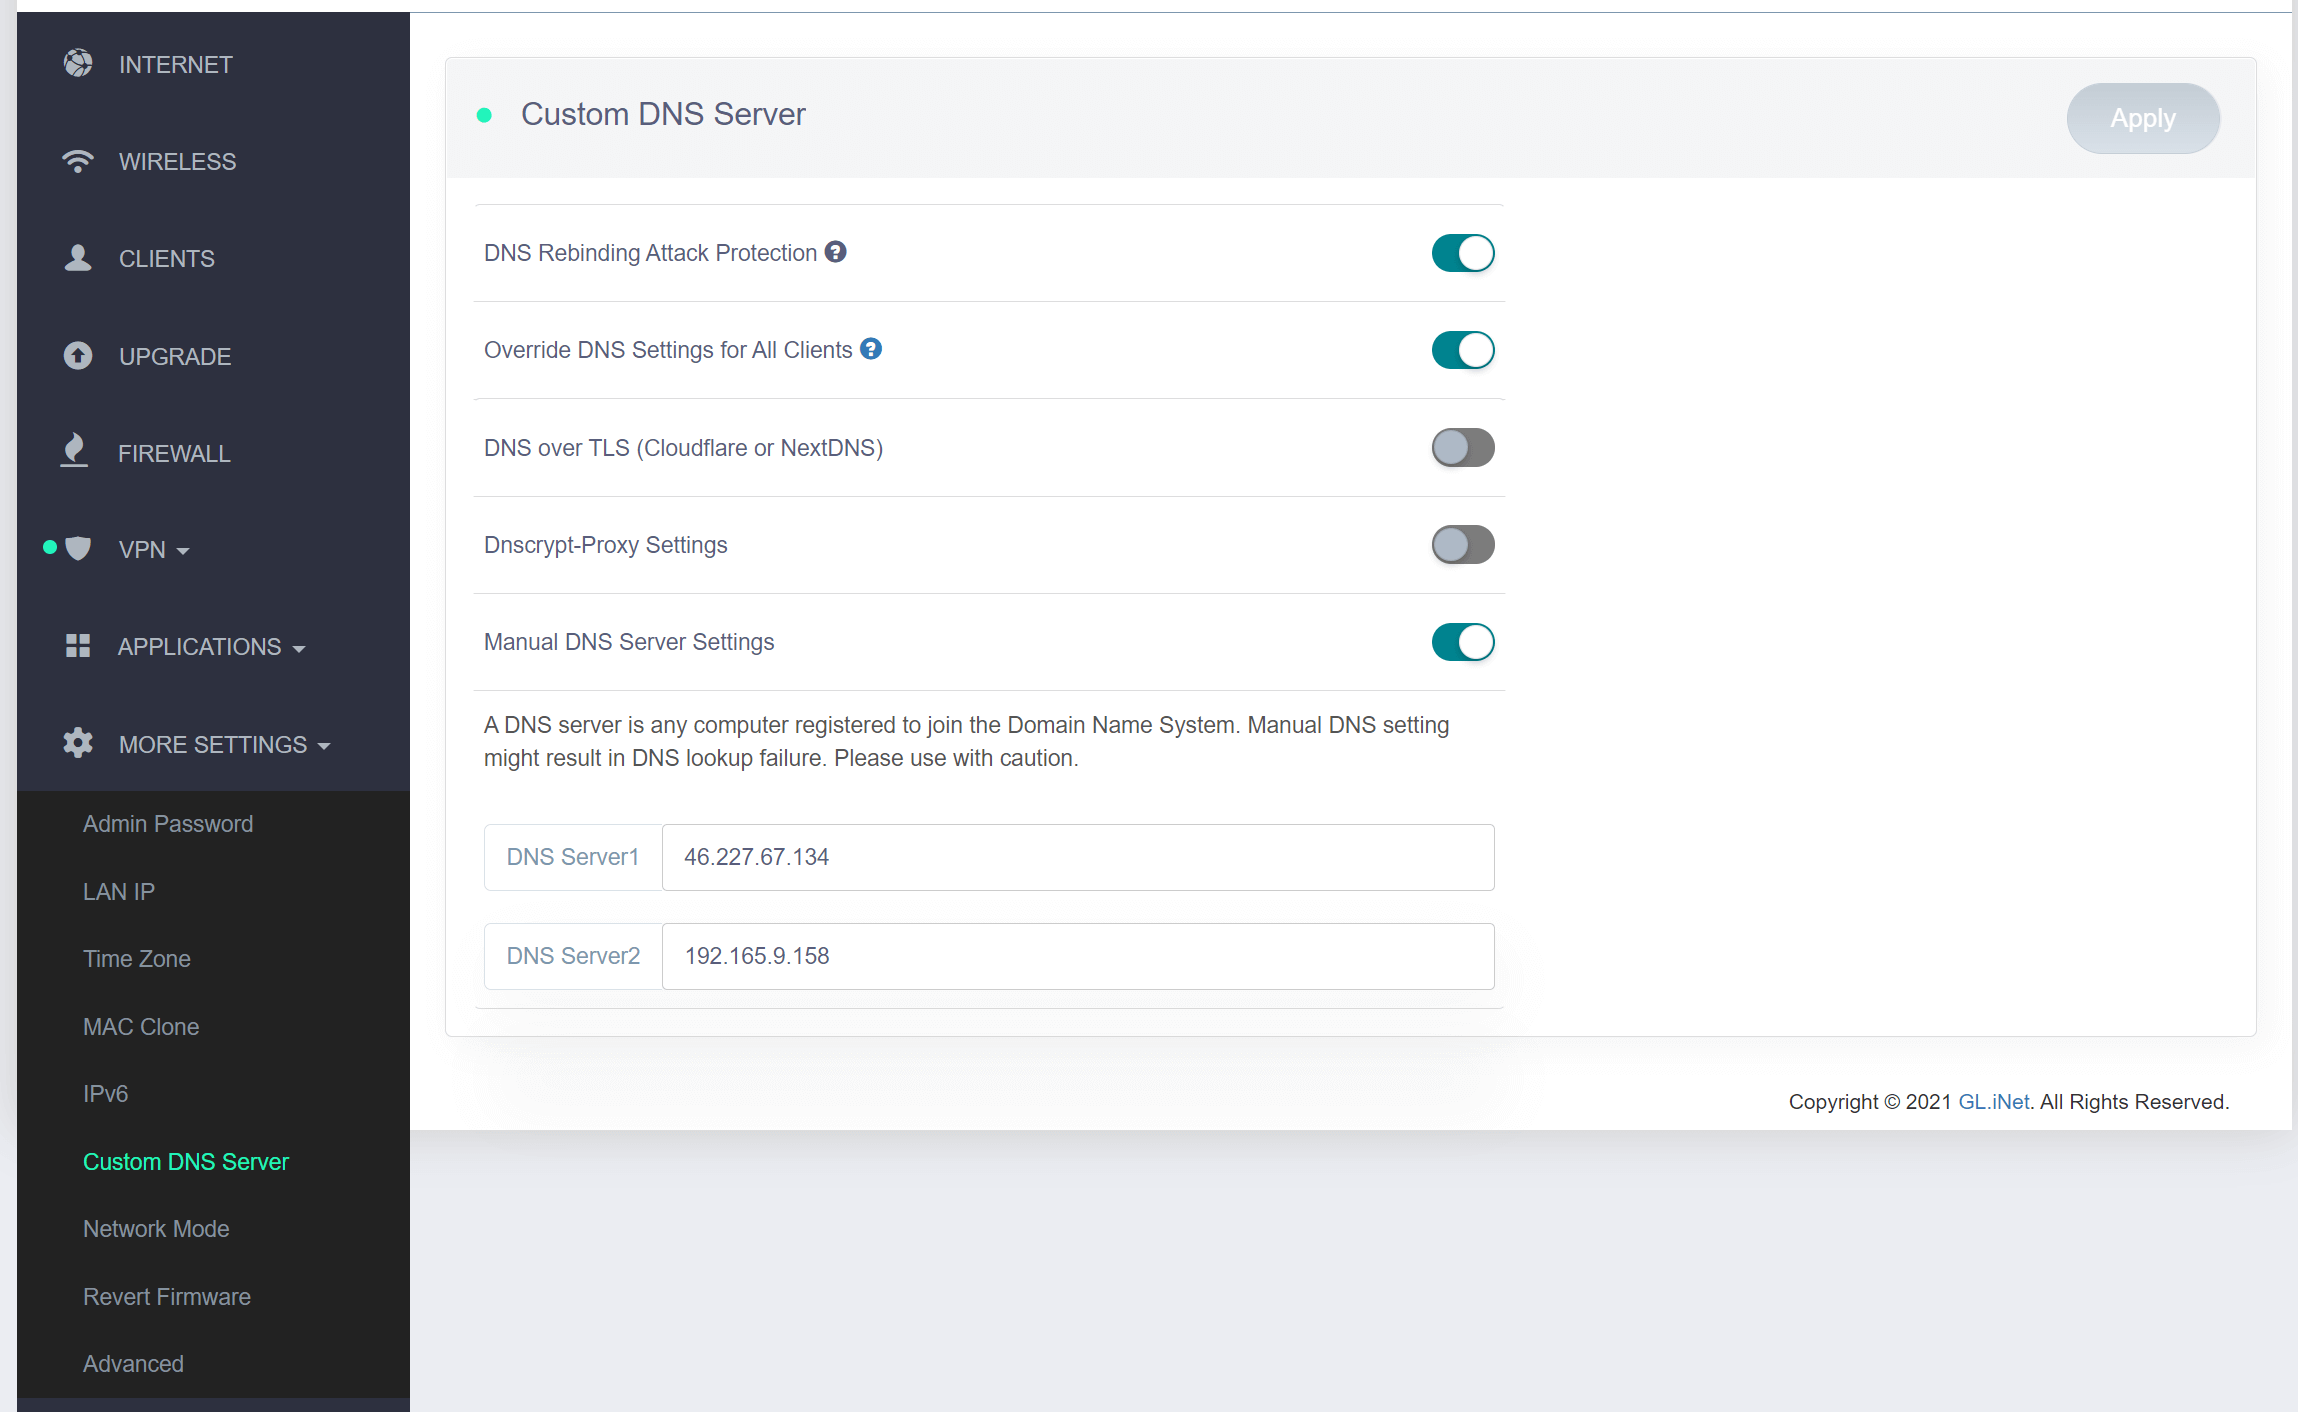
Click on Apply
4. Koble til OVPN
Naviger til VPN → OpenVPN Client
To connect, select the OpenVPN profile you configured in step 2 and click Connect
If everything went well, an IP address should appear in the IP Address field, and the status of the OpenVPN Client should turn green. 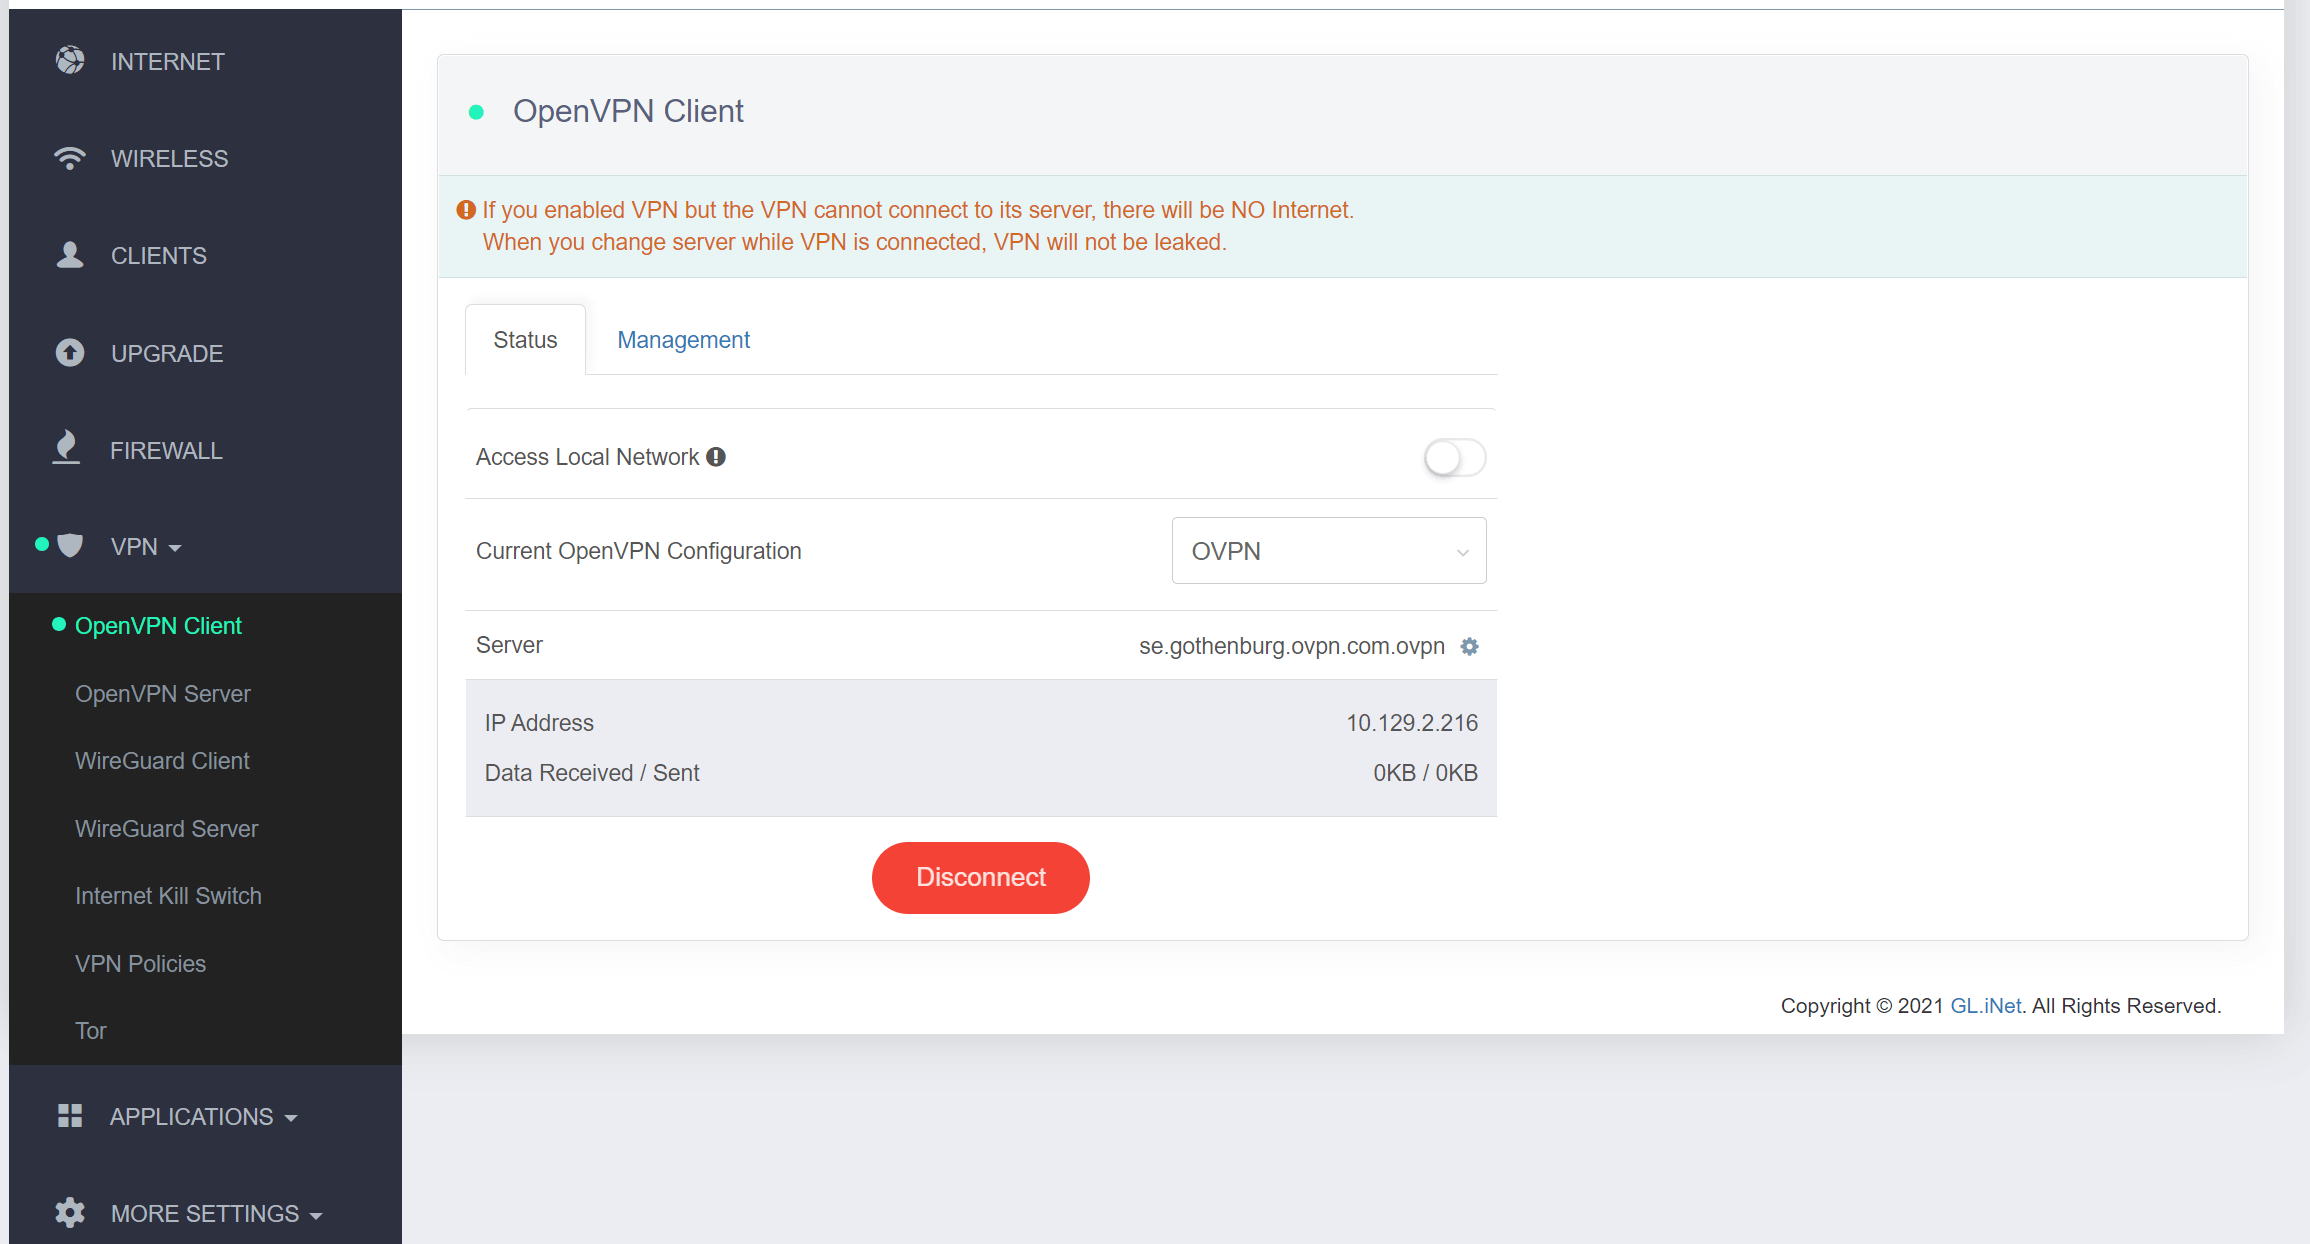
5. Kontroller at tilkoblingen var vellykket
Du bør nå være koblet til OVPN og kunne surfe trygt på Internett. For å sikre at alt ble riktig konfigurert, vennligst sjekk dashbordet for å bekrefte at du er tilkoblet.