
In this article, we’ll detail how to connect a Helium miner on an
LTE network with a VPN.
Helium miners have
been all the rage lately, and one of the benefits is that they can be
placed almost anywhere as long as it has access to internet and
electricity.
What is the Helium Network?
Helium is a
decentralized wireless network built up by multiple low-power smart
devices (IoT) working together in order to transmit and receive data over a large area. Unlike Wi-Fi however, the range of a Helium hotspot can be
several kilometers, and it transmits much less data than a traditional
Wi-Fi network.
Coverage providers
(that is, the companies or private citizens) that run the Helium
hotspots are known as ”miners” and miners can purchase
Helium hotspots to provide coverage for the Helium network and in return be
paid Helium tokens (HNT). The amount of HNT coverage providers are
paid depend on various factors such as the number of other Helium
hotspots located in the same area (more is better! Up to a
point).
What is the Helium Network used for?
The Helium network
allows any compatible IoT device to connect to Helium hotspots
without having to use a cellular network or Wi-Fi to transmit its
data. This allows products such as smart pet collars to keep track of
the location and health of your pet without having to connect it to a
Wi-Fi or a mobile network.
How do I configure my Helium Hotspot with a VPN?
If you want to
configure your Helium Hotspot with a VPN, the first thing you need is
a compatible VPN router that also supports port forwarding.
Examples of such routers are Vilfo and GL-inet.
In this guide, we’ll
be detailing how to do it on a GL-inet router.
Configure a Helium Hotspot on a GL-inet router
There are two ways to configure your Helium hotspot with OVPN, either with OpenVPN or WireGuard. Which one you choose is up to you. In this guide we'll be detailing how to do it in WireGuard as WireGuard offers better speed and lower latency than OpenVPN which is perfect for routers.
1. Download the configuration file
First you'll want to download the configuration file for OVPN. But before you do that, make sure that you have purchased a subscription with OVPN as well as the Public IPv4 add-on as both will be needed to connect your Helium Hotspot to a VPN.
Once purchased, you will want to make sure that your Public IPv4 add-on is using WireGuard. To do that, go to the OVPN dashboard and click on Open settings under Public IPv4. Then, click on Change next to Protocol and select WireGuard in the new drop-down, followed by Update.

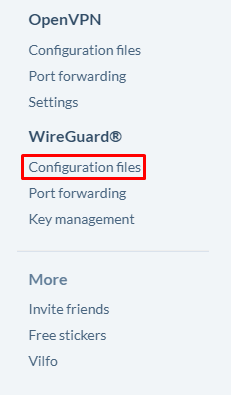
Next, you will want to download a WireGuard configuration file which will be used to connect to the VPN. For that you want to navigate to WireGuard® -> Configuration Files:
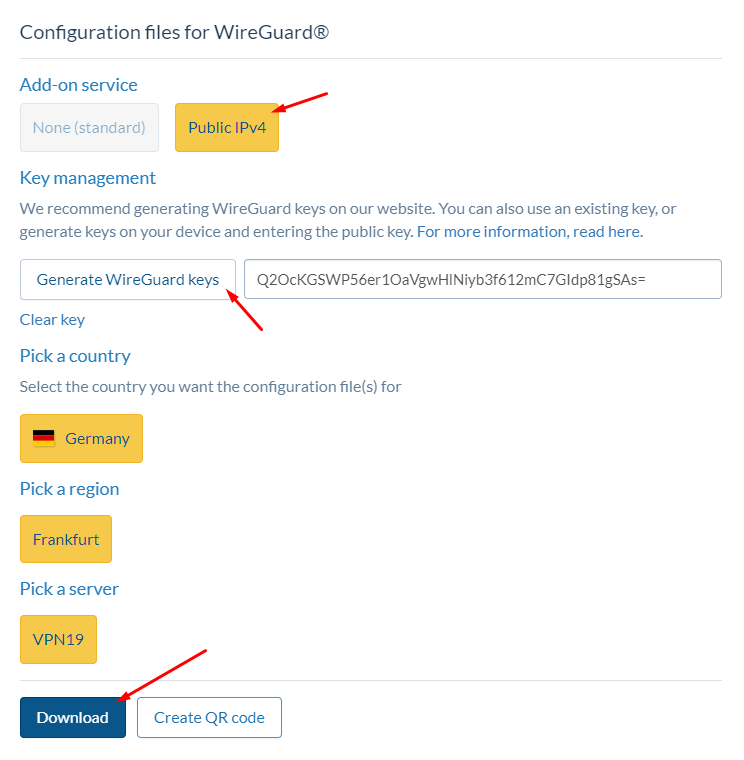
On the configuration page, first click on Public IPv4, then on Generate WireGuard keys, and finally Download.
2. Configure WireGuard
The next step is setting up the WireGuard configuration in your GL-inet router. For that, you will want to log in to your router's browser interface.
In your browser, enter 192.168.8.1 into the URL field and click on OK. If the page fails to load, it's possible you are either not connected to the network created by the GL-inet router, or your router is using a different IP address. In that case, check the back of your router to see which IP address it is using, or enter the IP address you gave the router if you have changed it yourself.
Log in with your router username and password. The default username and password for your router should be included either on the backside of your router or in the router documentation, but it is strongly recommended that you set your own username and password to prevent unauthorized access to the router.
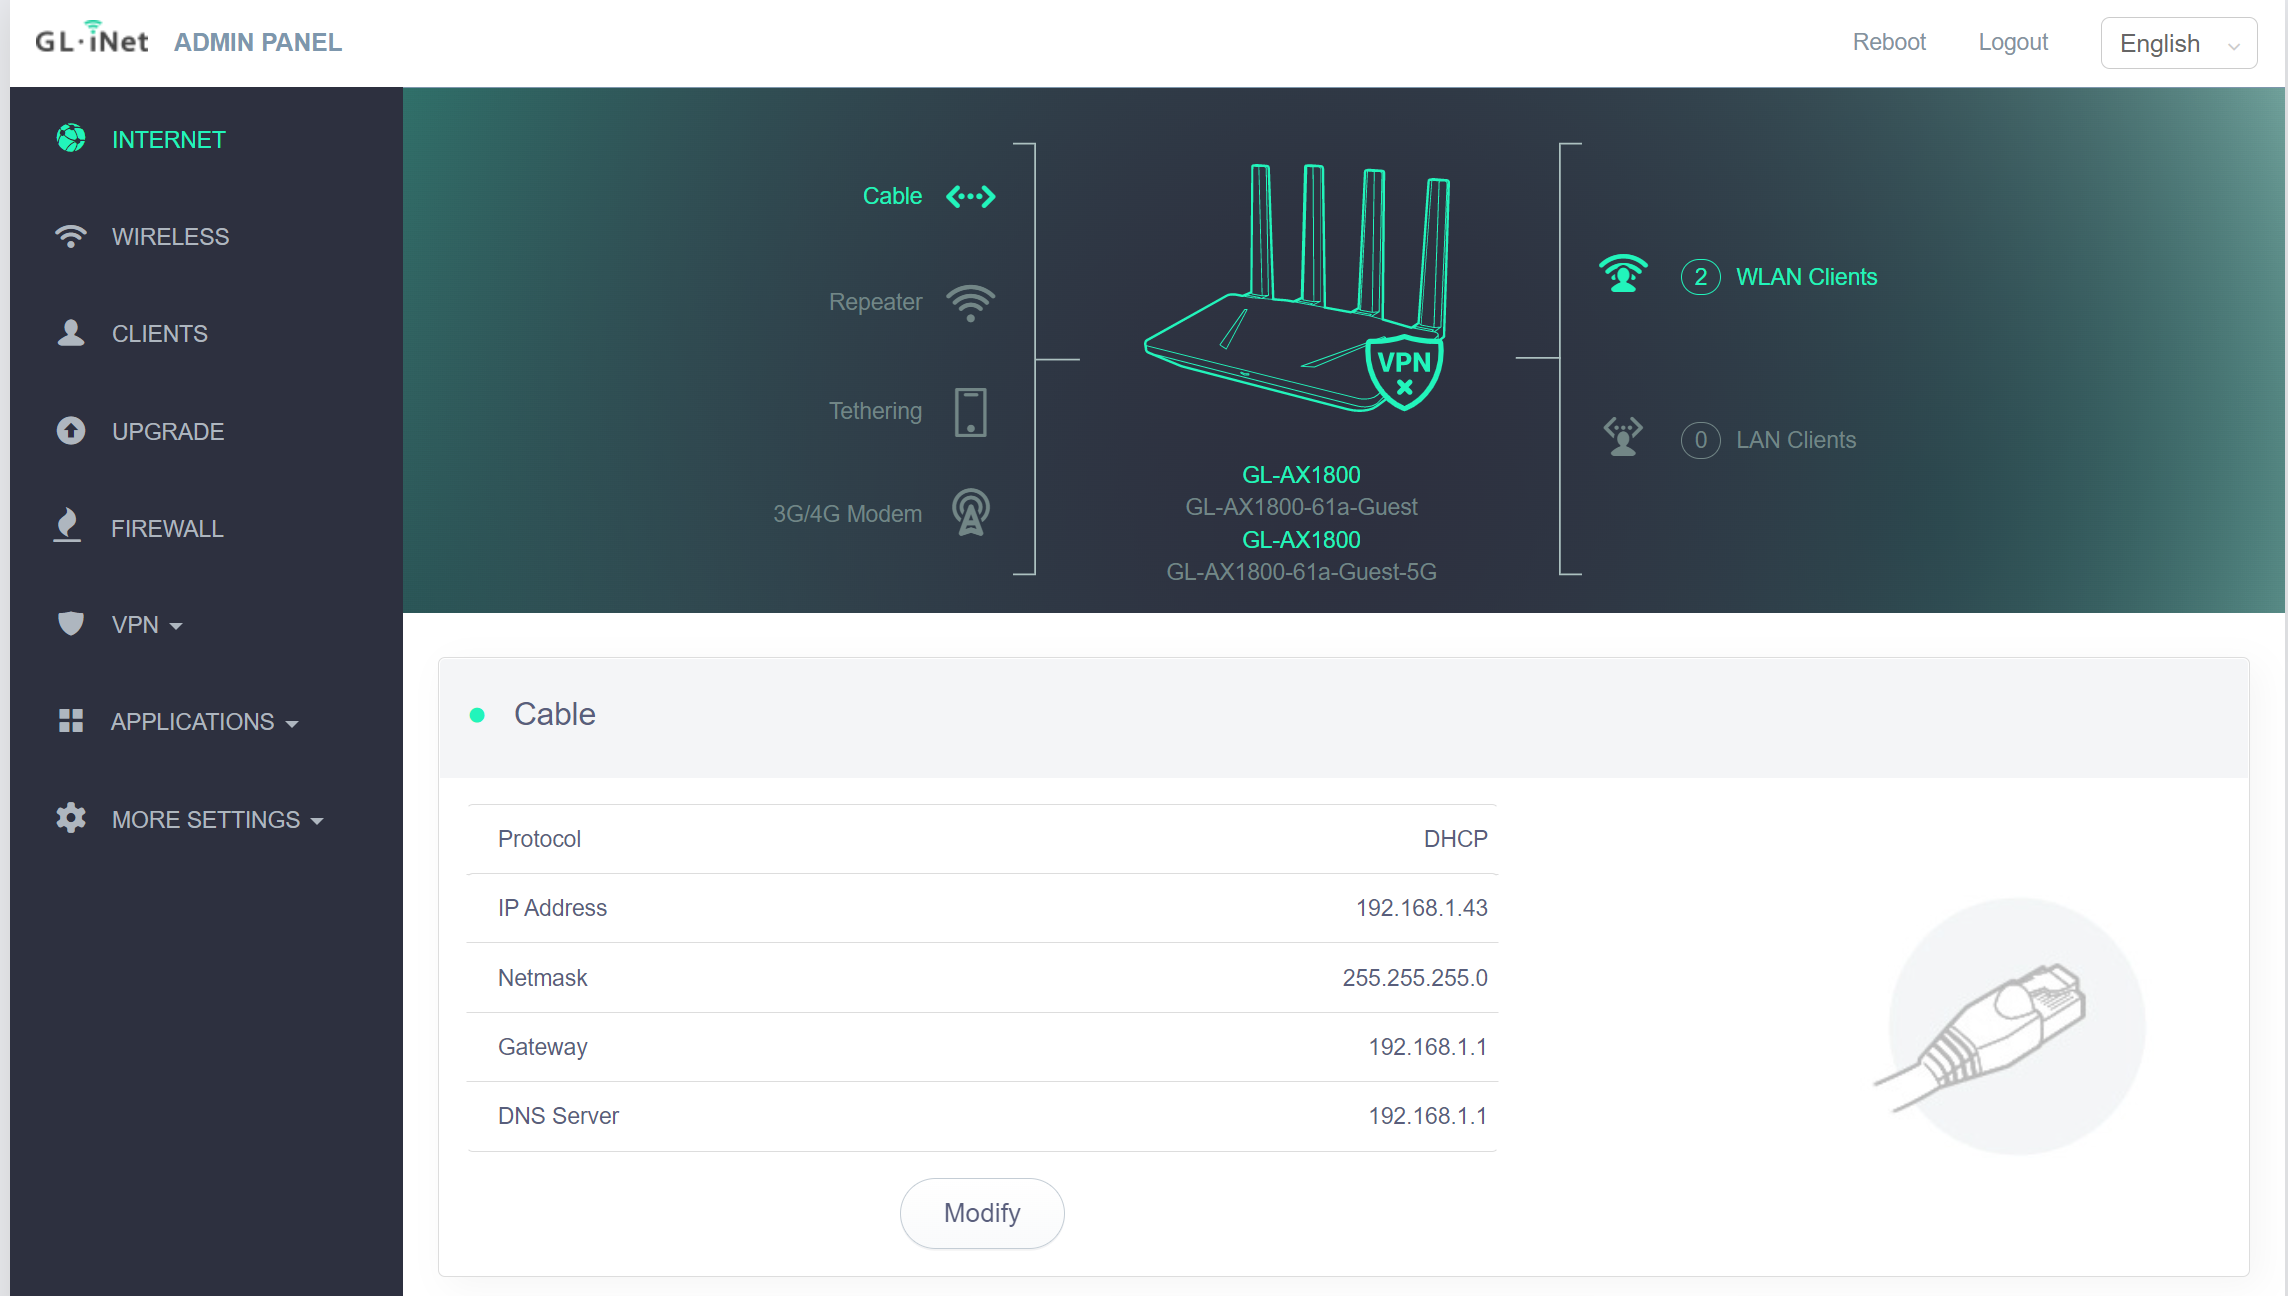
Once you have logged in, you should be presented with the router user interface.
From here, you will want to navigate to VPN -> WireGuard Client from the left menu where you will be presented wit ha new page.
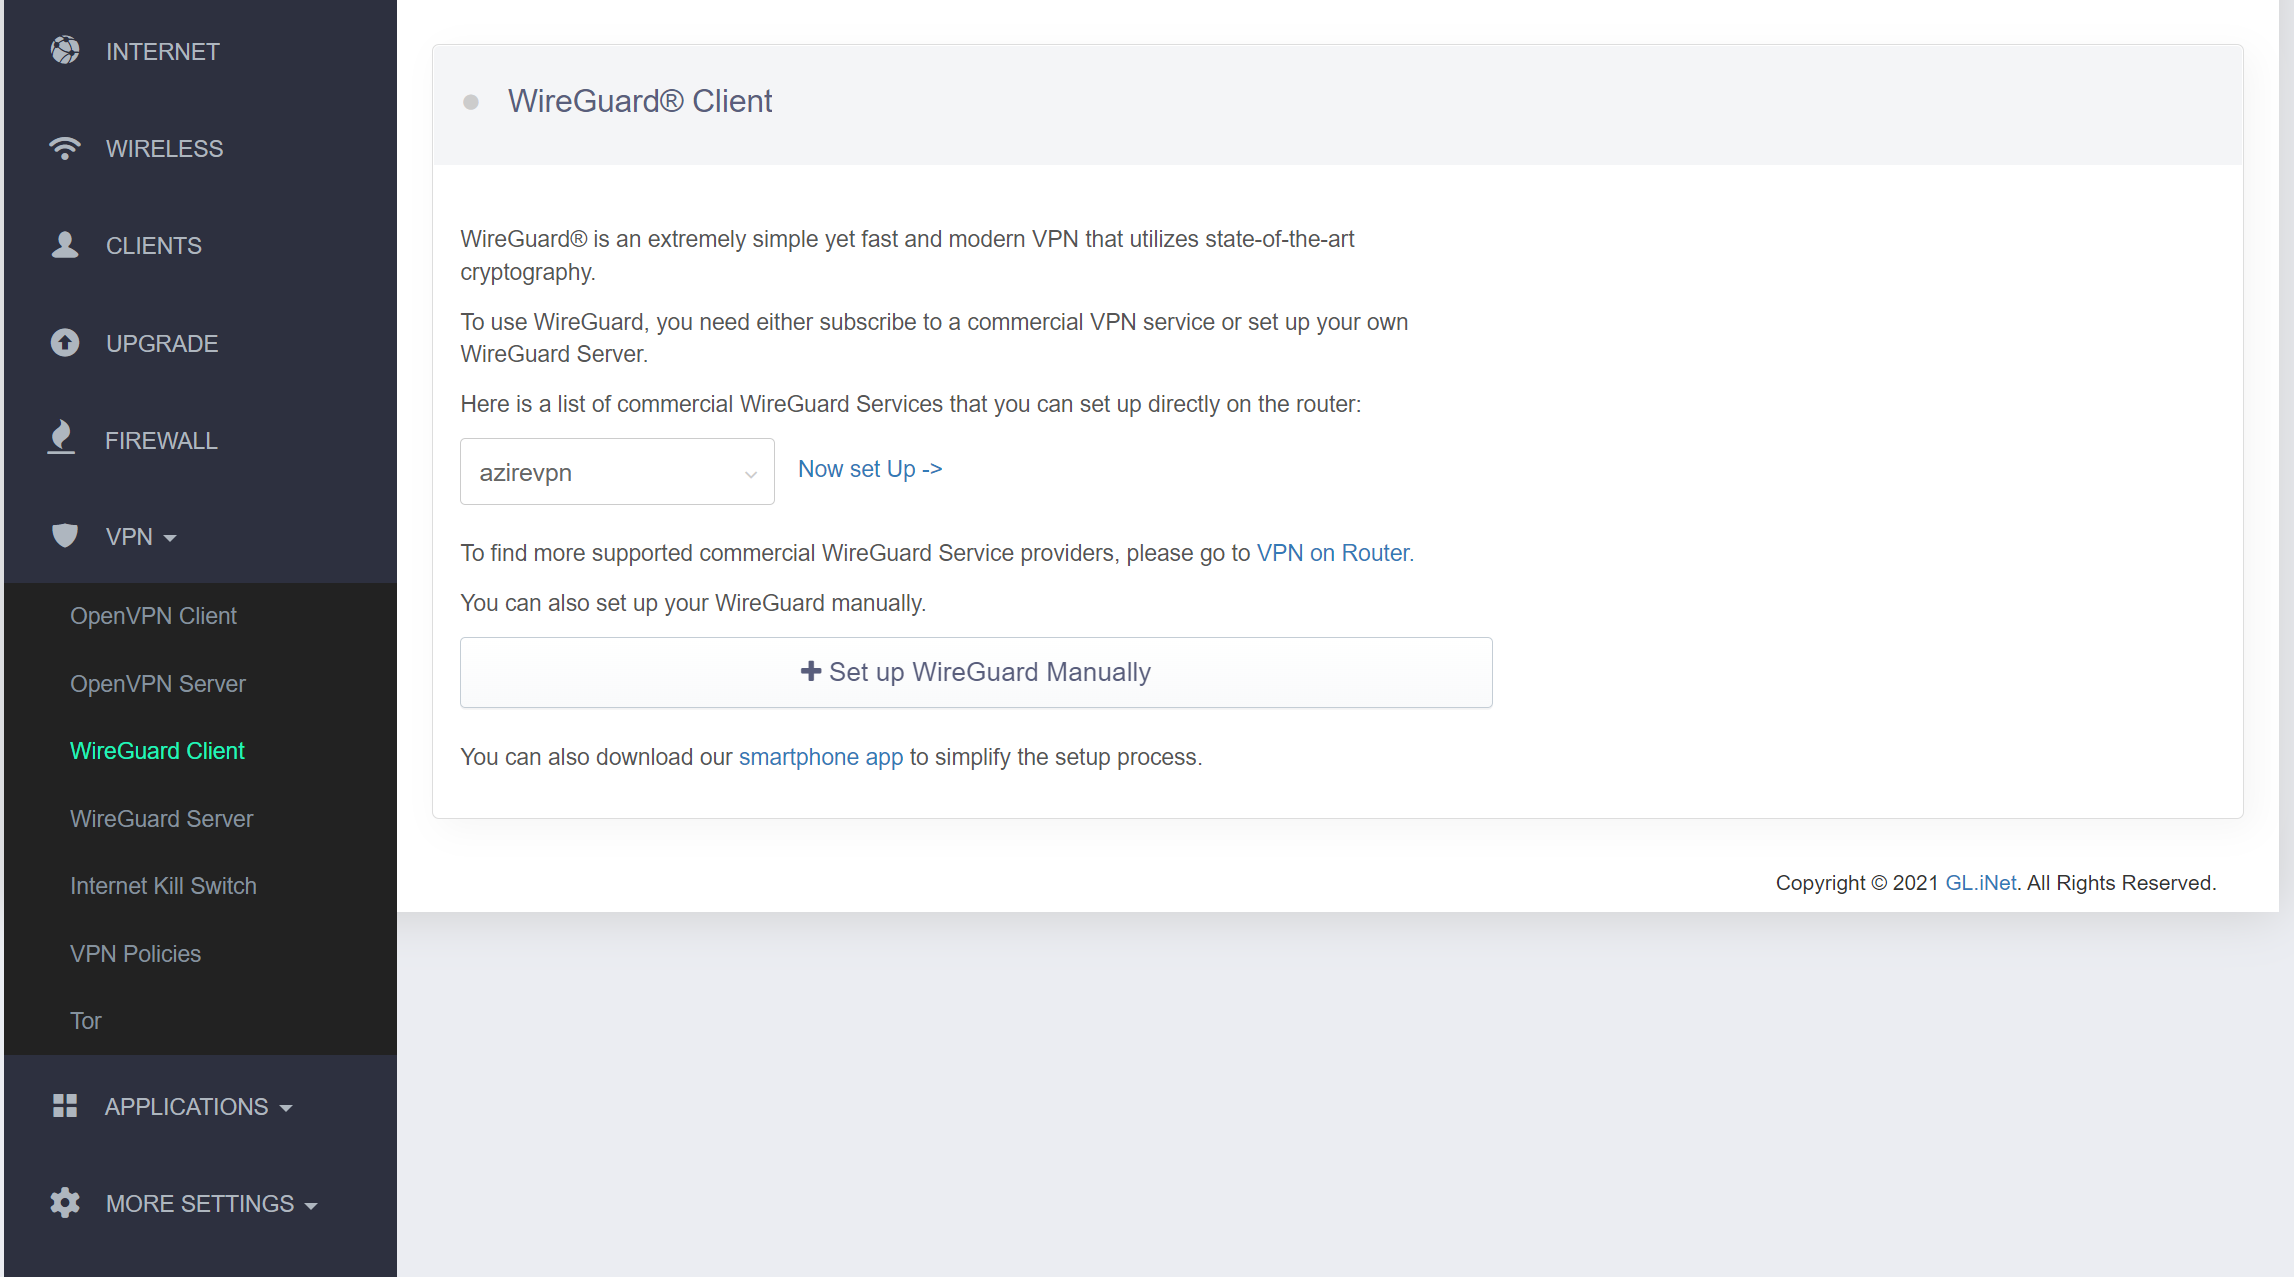
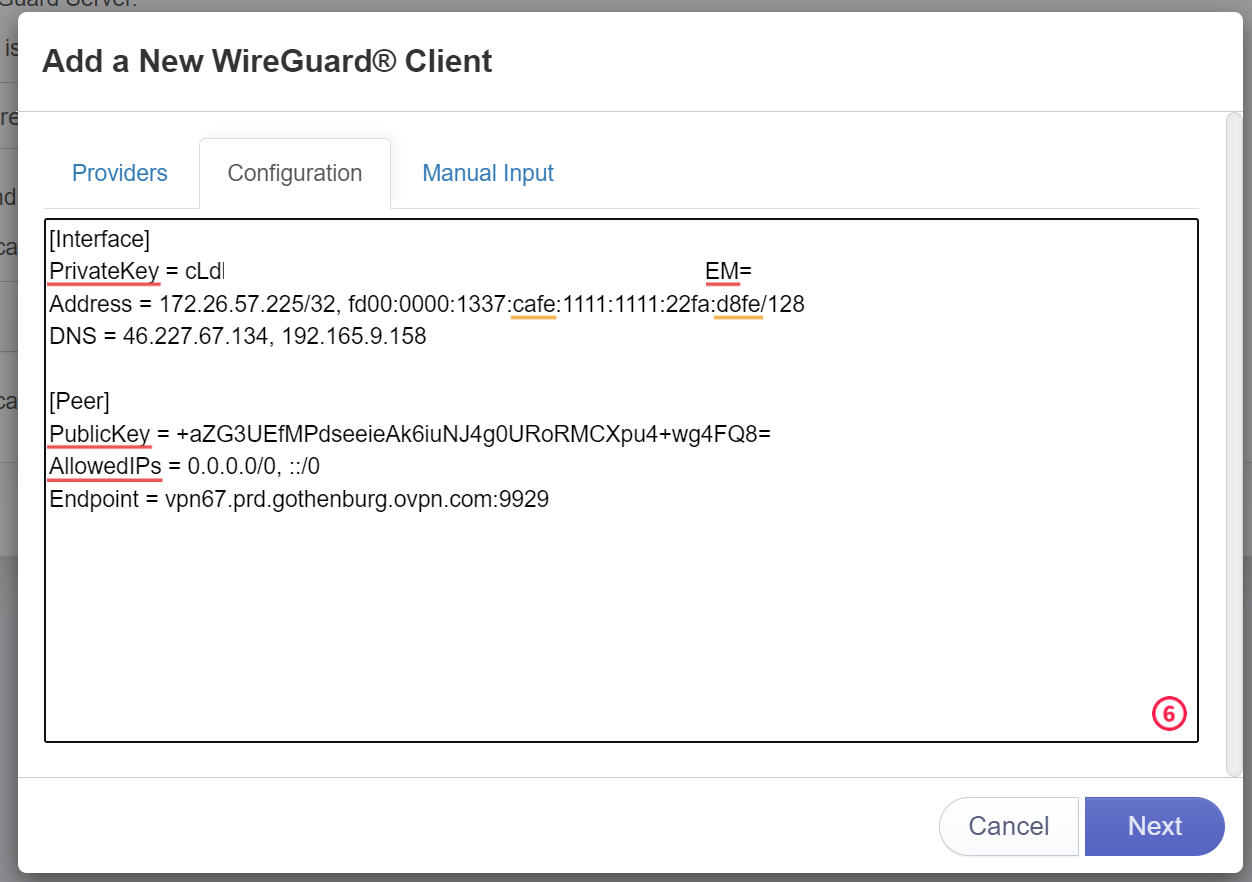
Click on +Set up WireGuard Manually and then on Configuration. Next, you will want to open the configuration file you downloaded in the previous step. You can open the configuration file in any text editor on your computer such as Notepad or Word. Copy the contents of your configuration file into the text field:
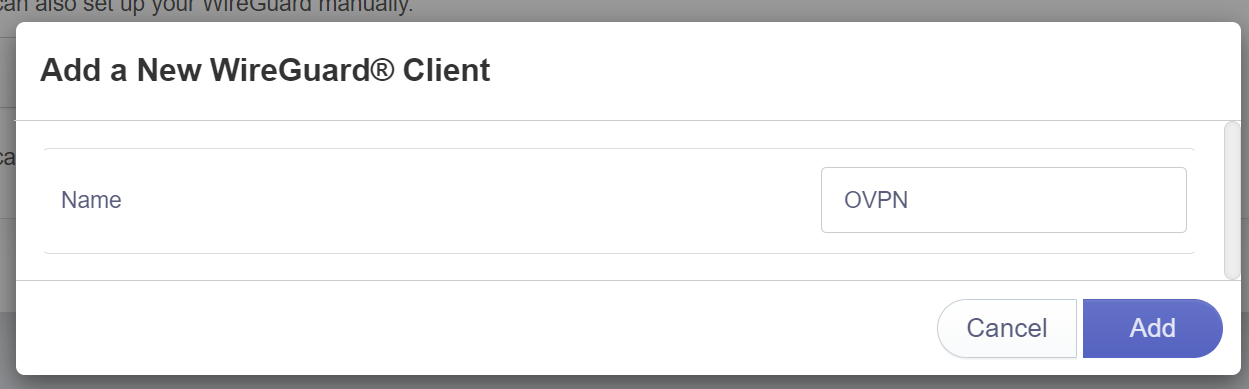
Once you've pasted the contents of the configuration file into the text field, click on Next, where you will be asked to name your VPN connection. We've named it OVPN but you're free to enter your own name.
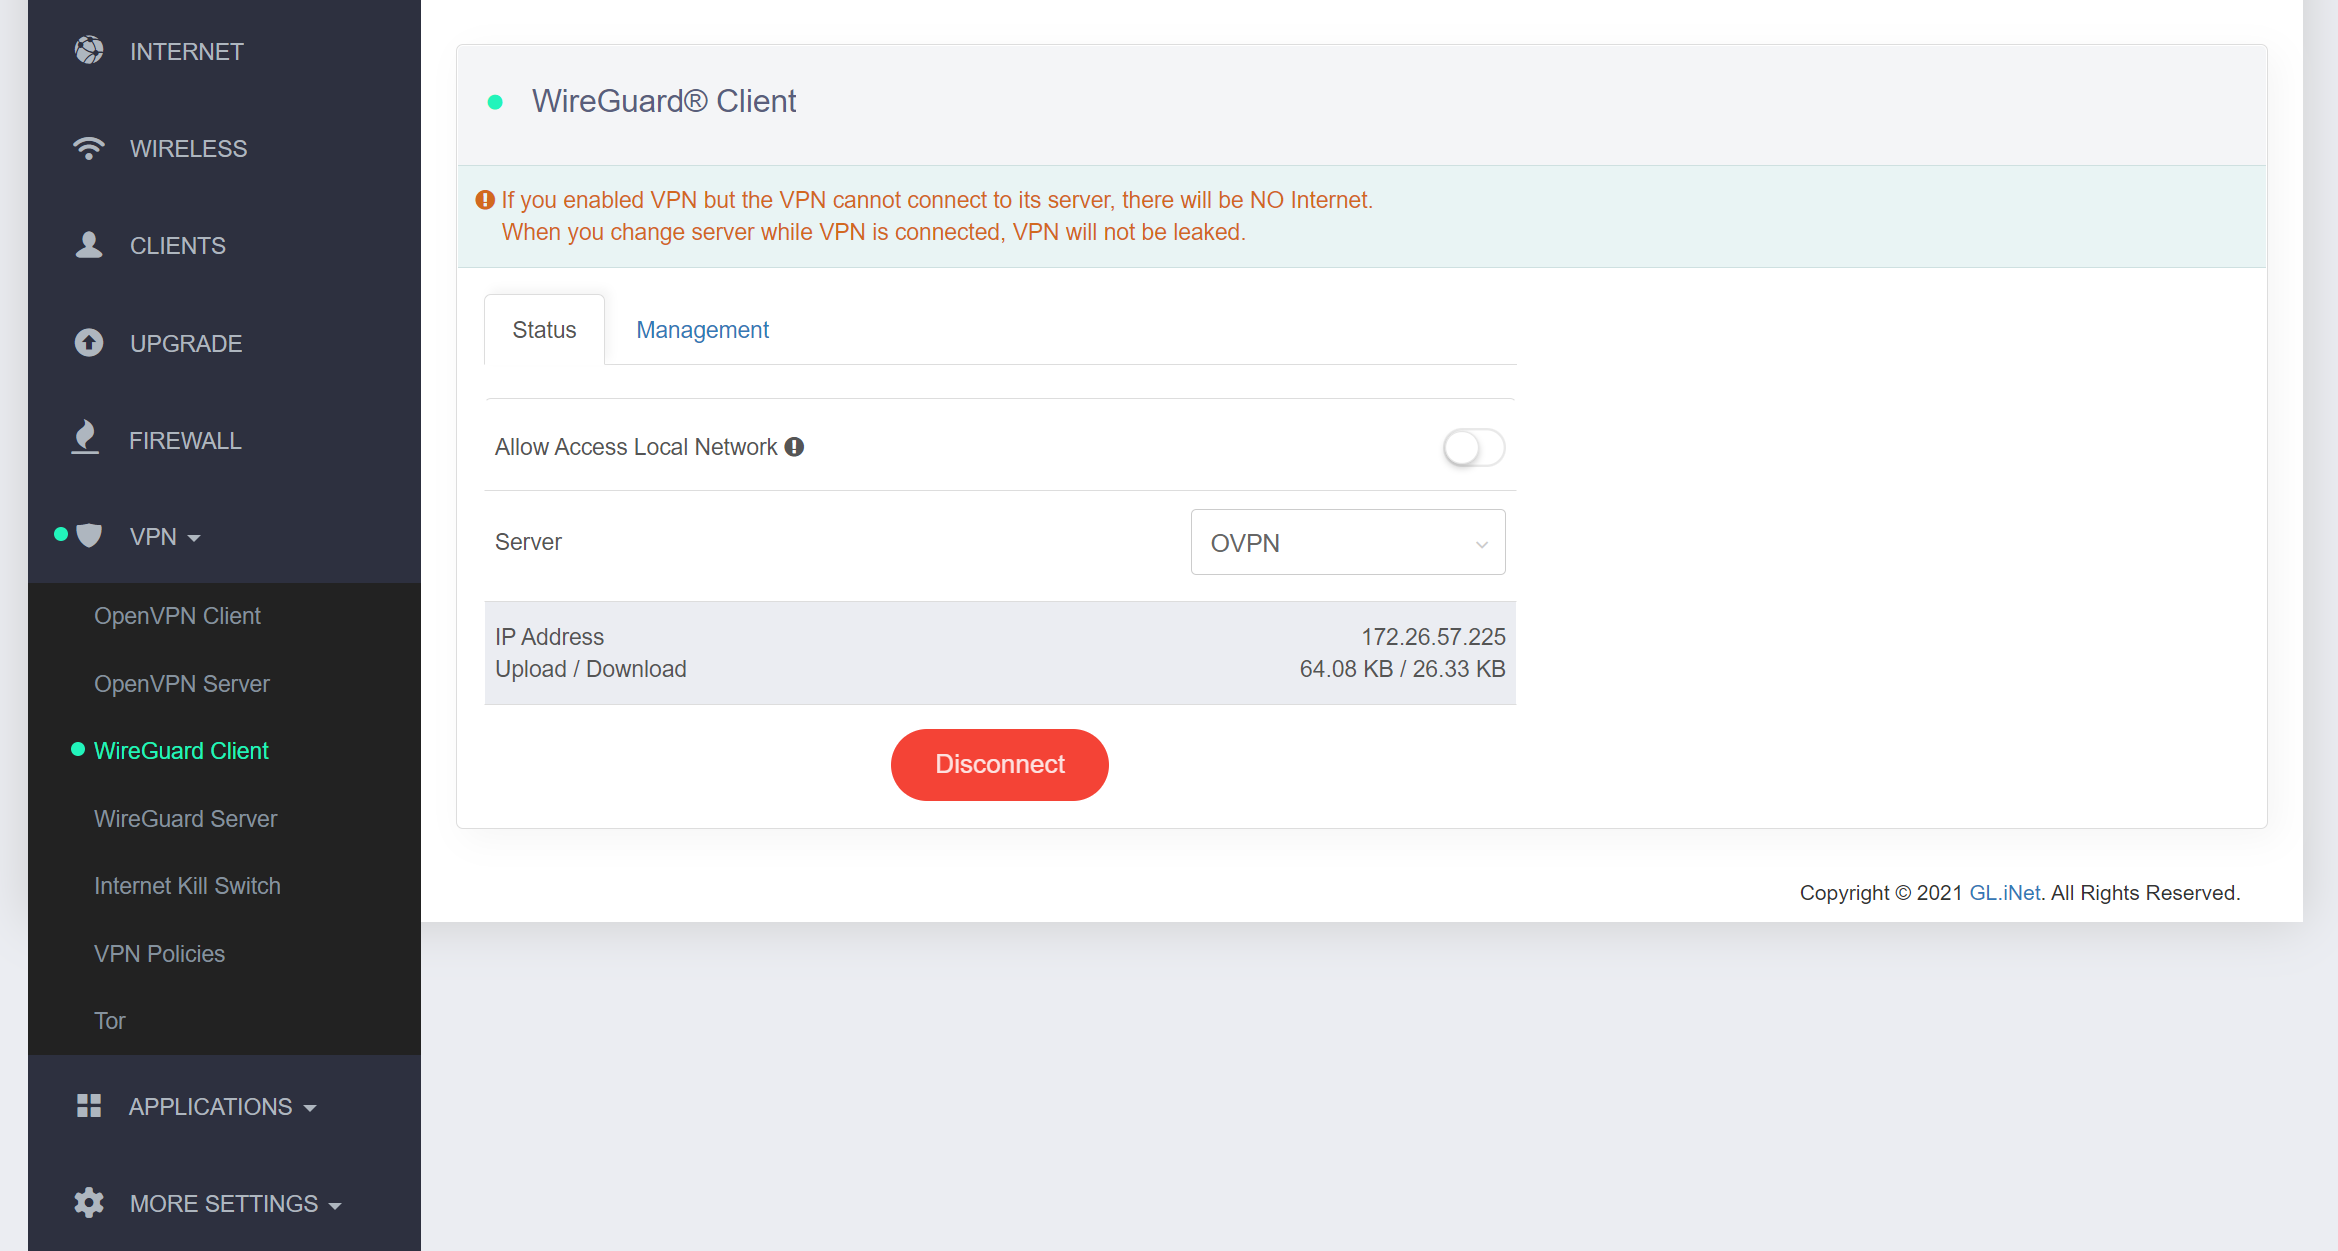
You're almost done now! Next you'll want to start the connection. Simply click on Connect and you're good to go. If the connection successfully started you'll see something like this:
Configuring the ports for your Helium Hotspot
Next, you will need
to set a static IP adress for your Helium hotspot on your network.
This will prevent your device’s IP address from changing, thus
losing the port rules you’ve set up.
Setting a static IP address for your Helium hotspot
First, open the
Helium app and open the
Diagnostics tool and
make note of your hospot’s MAC address, you will need it soon.
Next, navigate to More Settings → LAN IP in the menu to the left.
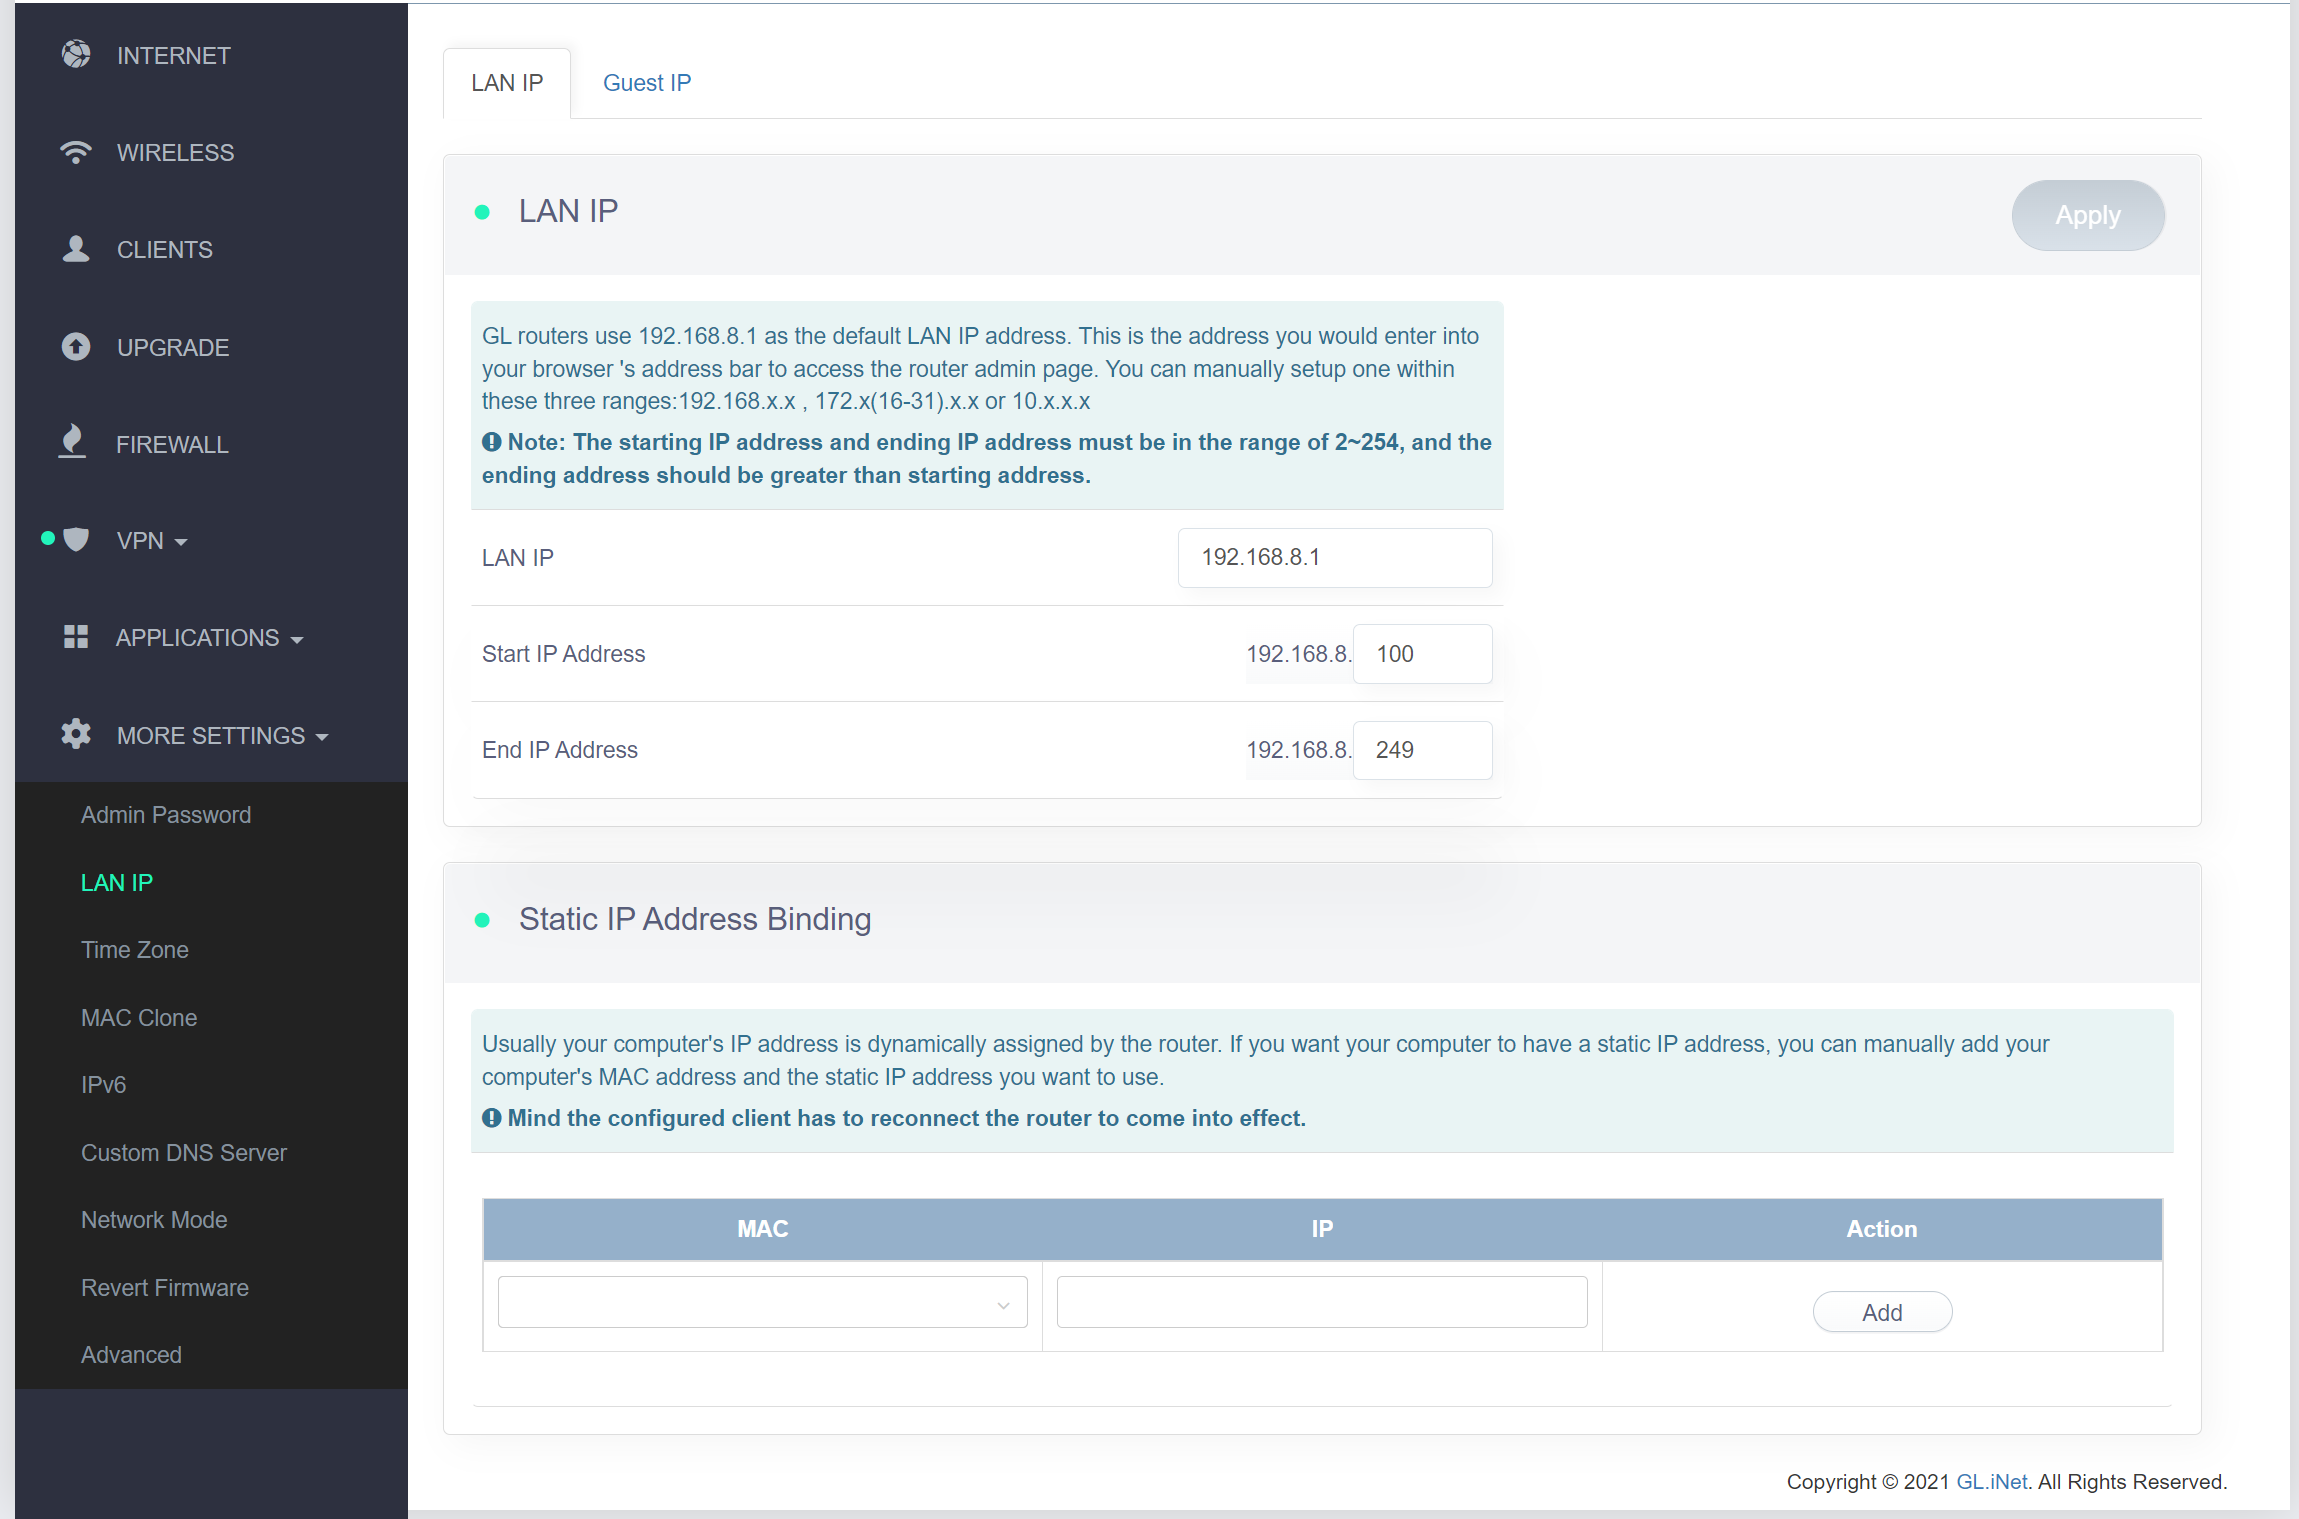
Under Static IP Address Binding,
select the MAC address of your Helium hotspot from the drop-down list
and click Add. Once
done, restart your Helium hotspot.
The last step is to forward port 44158 from the VPN connection and send it to your Helium hotspot.
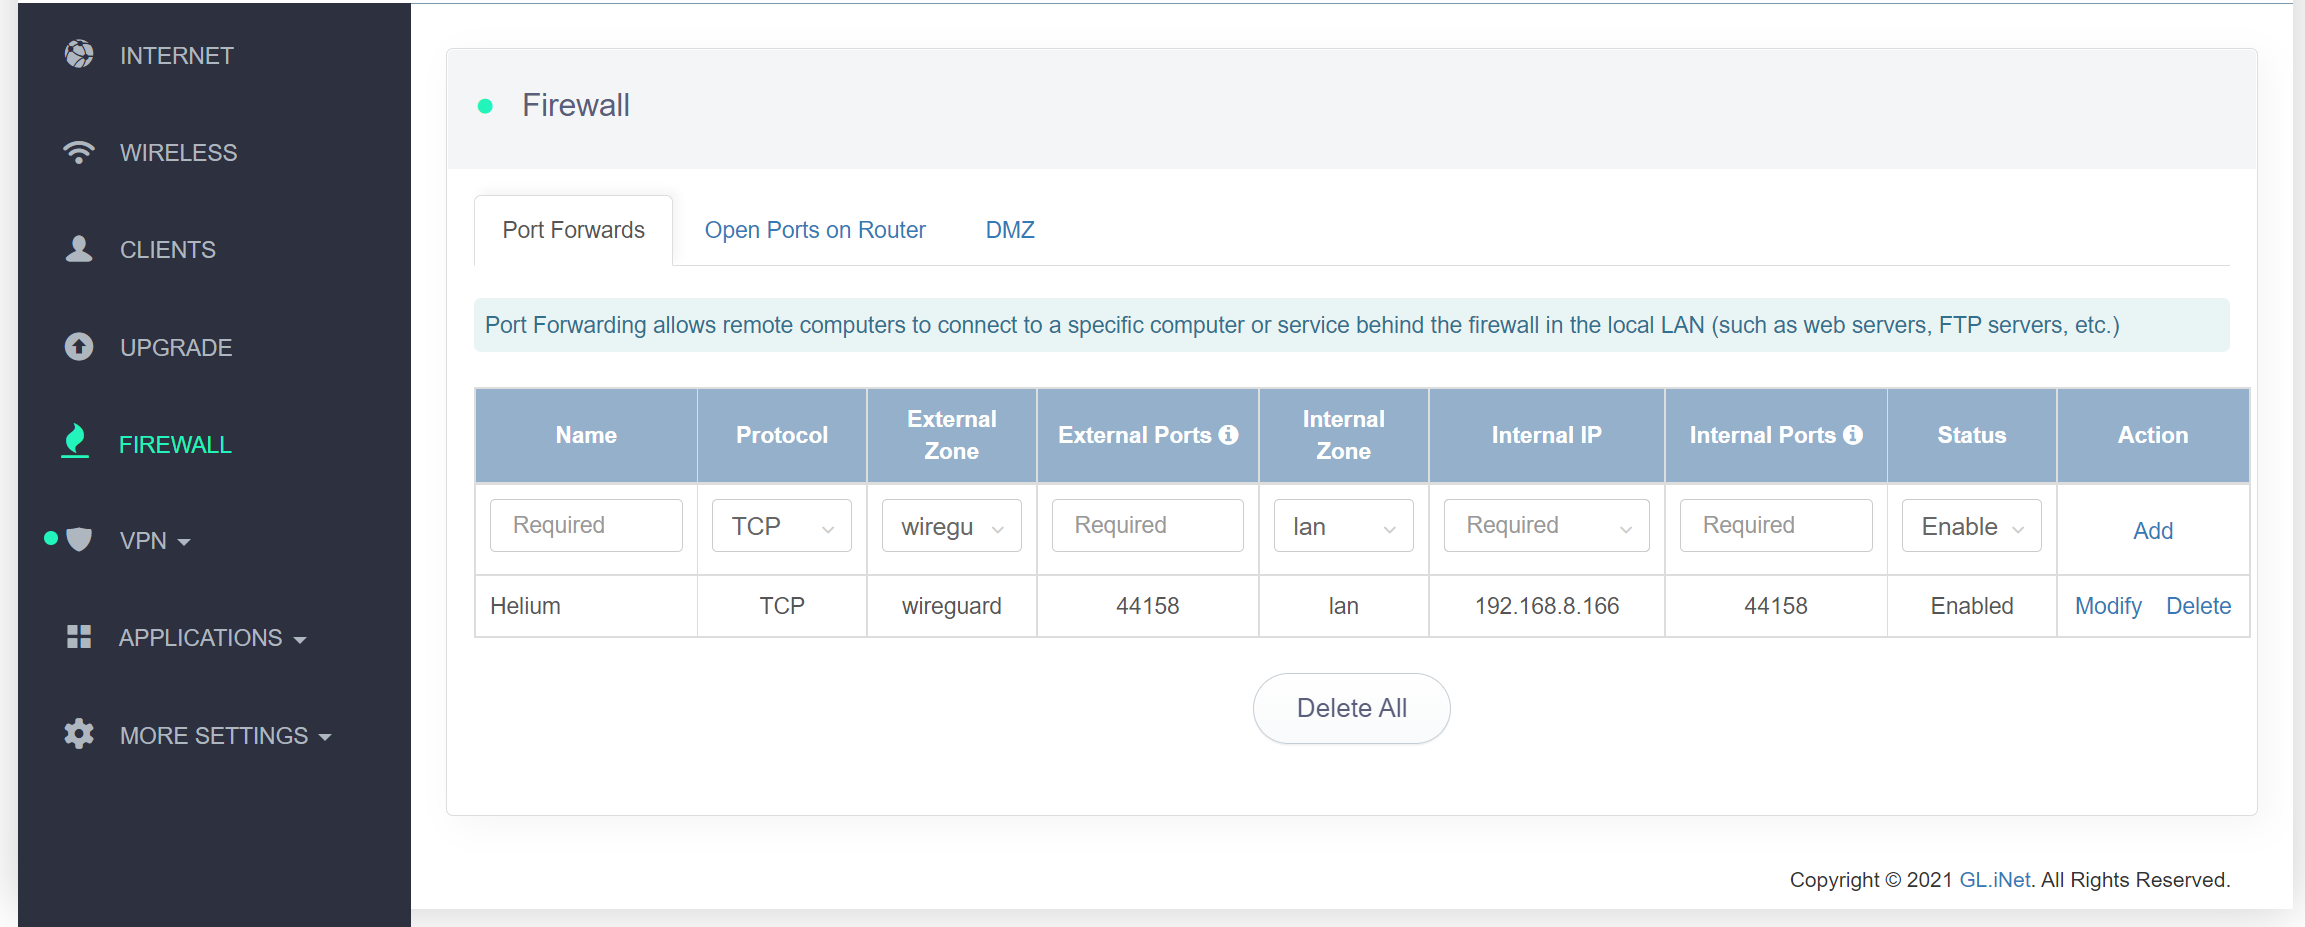
Forwarding ports for your Helium hotspot
Navigate
to Firewall → Port Forwards
Enter
the following information:
Name:
Helium
Protocol: TCP
Internal IP: The IP your Helium hotspot was assigned in the previous
step
External
Zone: WireGuard
External
Ports: 44158
Internal Zone: lan
Internal ports: 44158
Click on Add
It should now look something like this:
And you're done! Your Helium hotspot is now configured with a static IP address behind a VPN.