
Install WireGuard on OPNsense
We recommend Vilfo OS instead as it's easy interface allows simultaneous VPN connections and has DNS leak protection, VPN killswitch and more built-in.
1. Install WireGuard
In recent versions of OPNSense, WireGuard is installed by default. In case it isn't, follow these instructions:
Go to System → Firmware → Plugins.
Search for WireGuard and install the one called os-wireguard-go.
Click on the + sign to install the plugin.
2. Generate the config(s) you want
Use OVPN if security is of importance
Your privacy and security is the core focus of OVPN. That's why we've implemented a multi-layered security model.
Learn more3. Configure the VPN connection
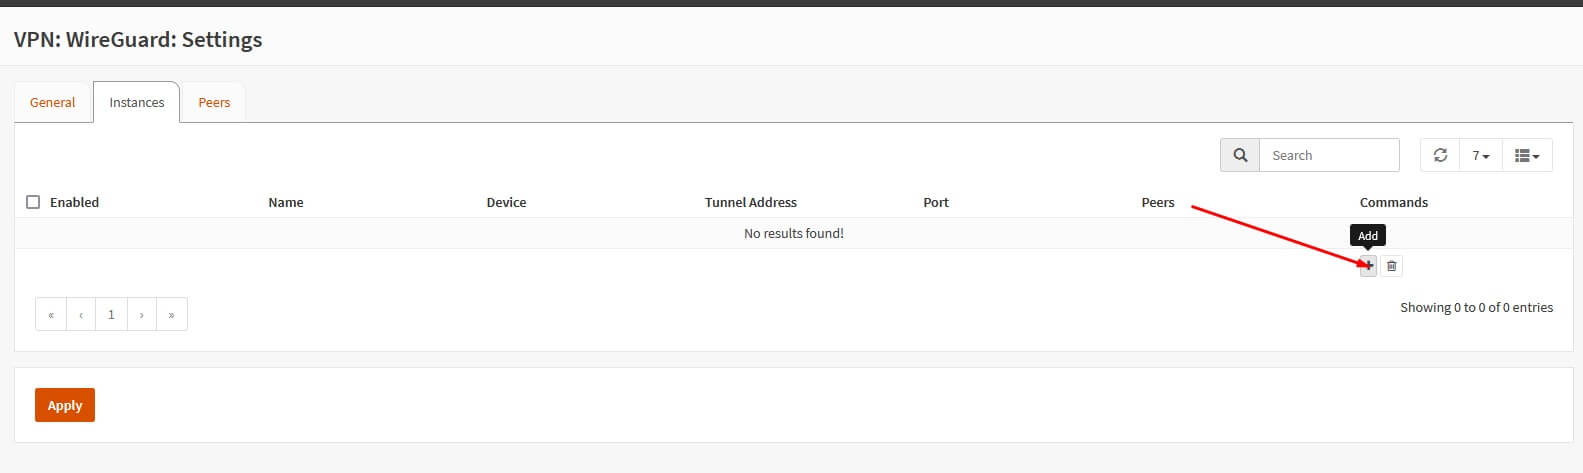
Go to VPN → WireGuard → Settings.
Click on the Instances tab
Click on the + Add button.
Enter the following information:
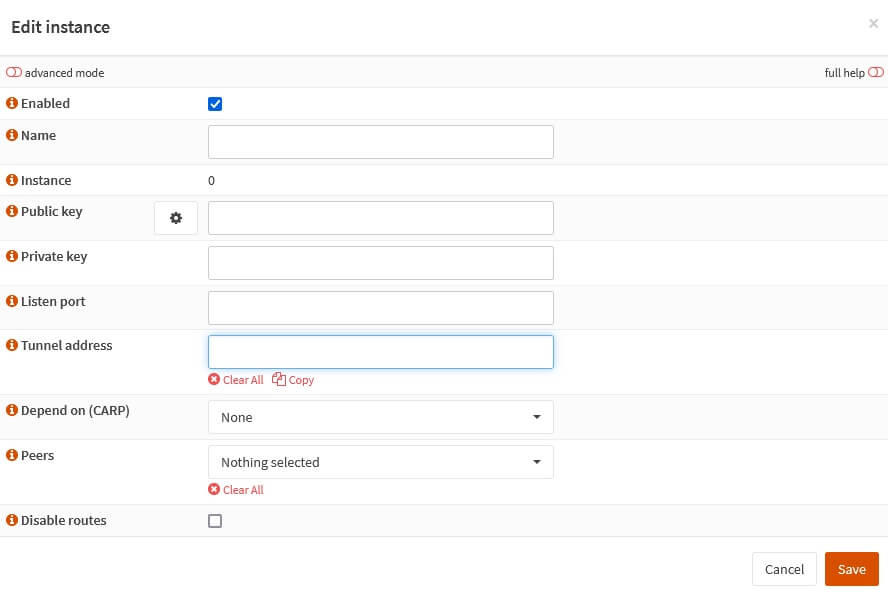
Click on Save.
Click on Peers. Click on + Add.
Enter the following information:
Click on Save.
Click on the General tab.
Make sure Enable WireGuard is checked.
Click on Apply.
4. Prevent DNS leak
Sign into the OPNsense web interface.
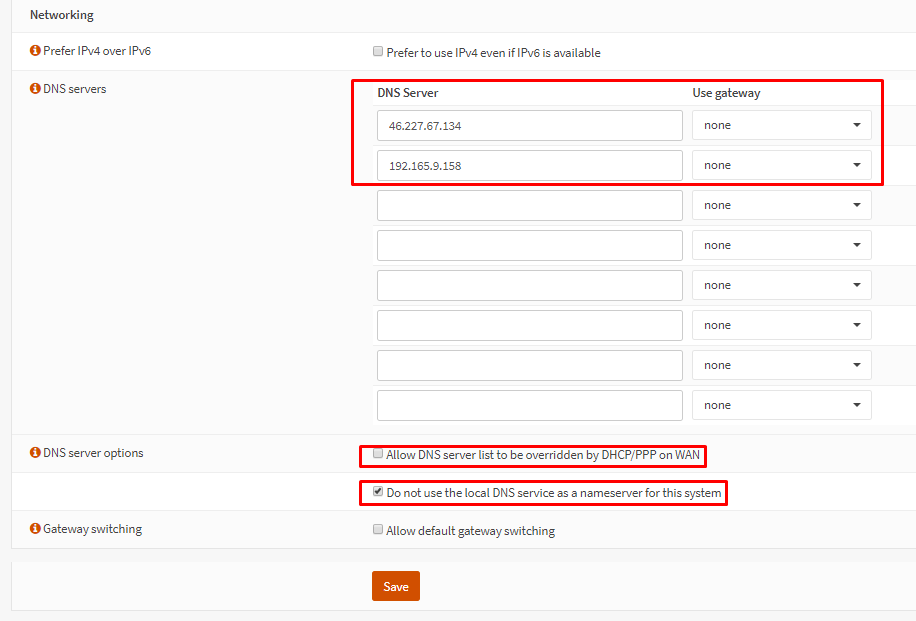
Navigate to System → Settings → General. Set the DNS servers to:
- 46.227.67.134
- 192.165.9.158
Make sure Allow DNS server list to be overridden by DHCP/PPP on WAN is not selected. However, Do not use the local DNS service as a nameserver for this system should be selected.
Click on Save.
5. Set up interface
Click on Interfaces → Assignments.
Under + Assign a new interface, select wg0 (WireGuard - OVPN) and click on Add.
Click on the newly-created interface (named OPT1 by default).
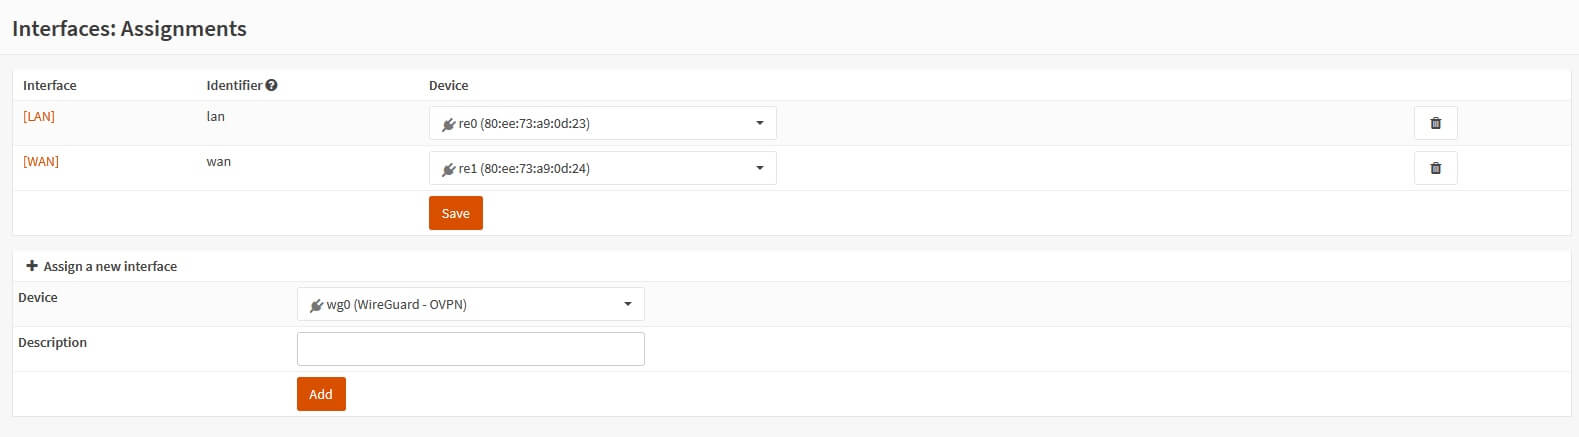
Make the following changes:
6. Firewall configuration
Navigate to Firewall → NAT → Outbound. Click on Hybrid outbound NAT rule generation.
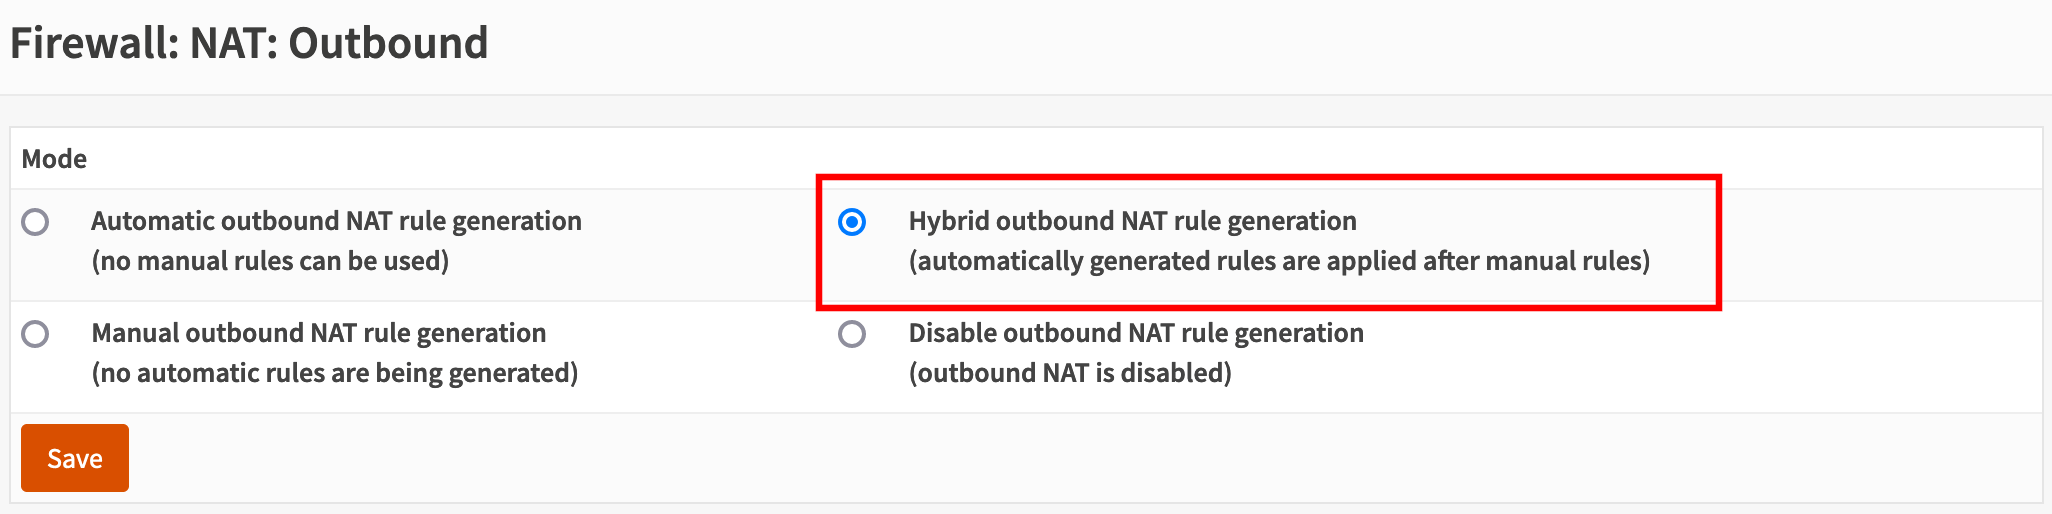
Click on Save. Click the orange plus icon under Manual rules, and then click Edit on the newly generated rule.

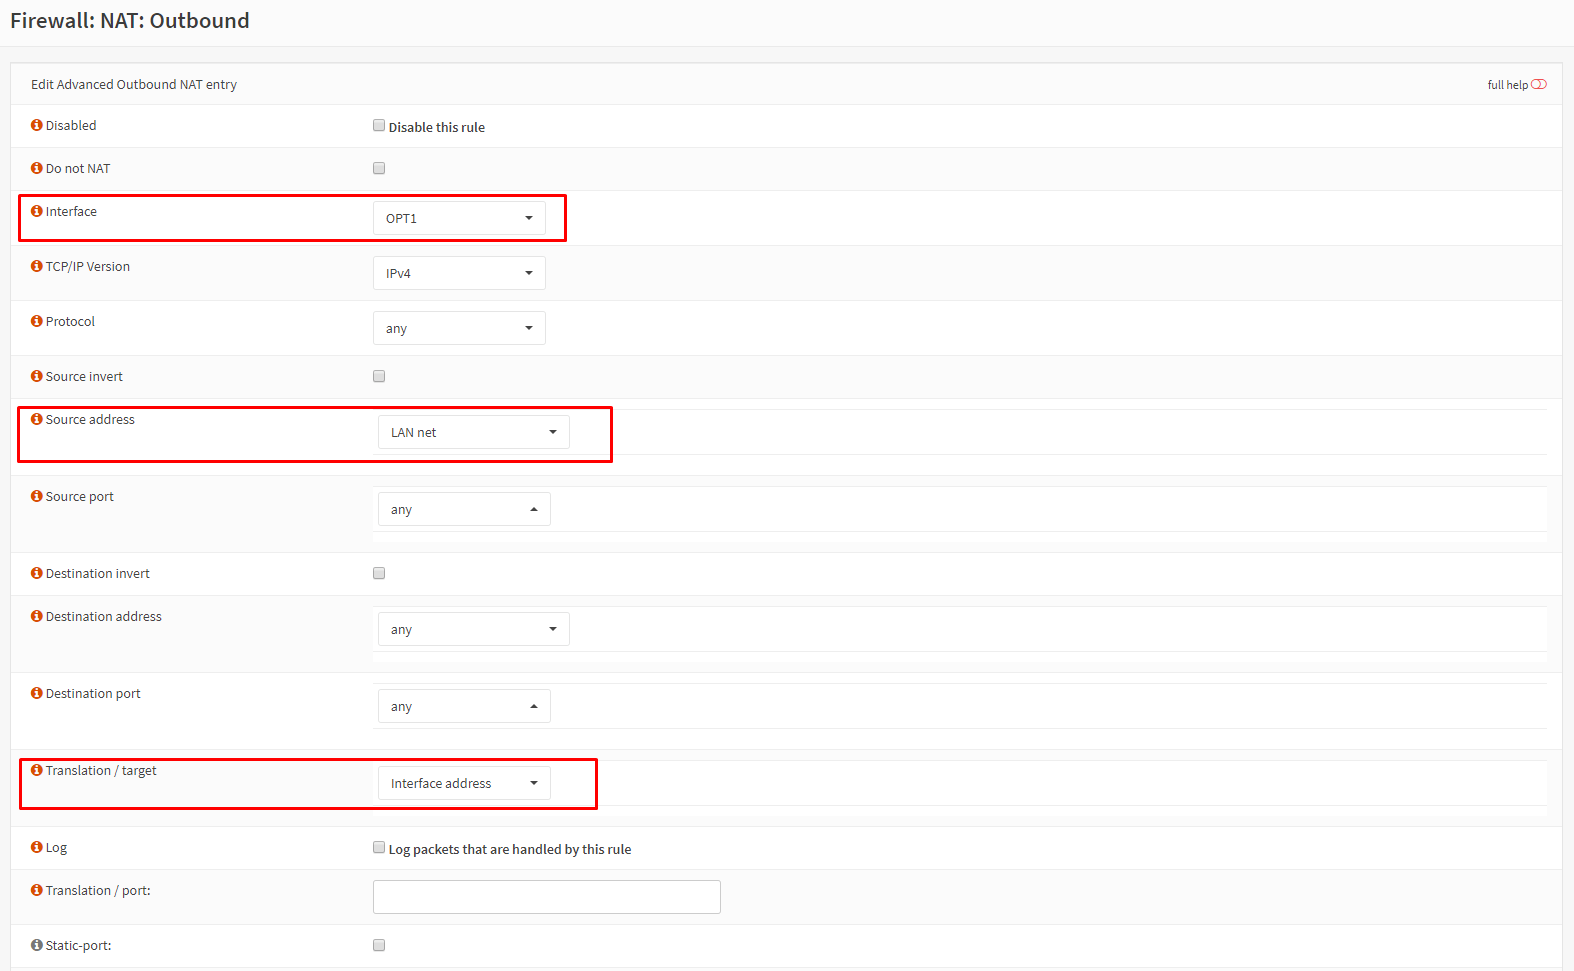
There are three modifications that need to be done. Everything else should be left as-is. The changes are:
- On Interface, select OPT1 from the drop-down menu.
- On Source Address, select LAN net.
- On Translation/Target, select Interface address.
Click on Save and Apply changes.
7. Verify that the connection was successful
You should now be connected to OVPN and be able to browse the internet safely. To make sure everything was set up correctly, please check the dashboard to verify that you are connected.
Troubleshooting
In case you get connected to OVPN in the WireGuard application, but don't have any internet connectivity, please read the troubleshooting article for WireGuard.
If your configuration files don't get imported, read our article about adding your private key manually in the configuration files.