
Install OVPN on pfSense
We recommend Vilfo OS instead as it's easy interface allows simultaneous VPN connections and has DNS leak protection, VPN killswitch and more built-in.
1. Change DNS servers
Navigate to System → General Setup.
Change the DNS servers in the list to:
- 46.227.67.134
- 192.165.9.158
Deselect, so that Allow DNS server list to be overridden by DHCP/PPP on WAN is not checked
Under DNS Resolution Behavior, select Use remote DNS servers, ignore local DNS. 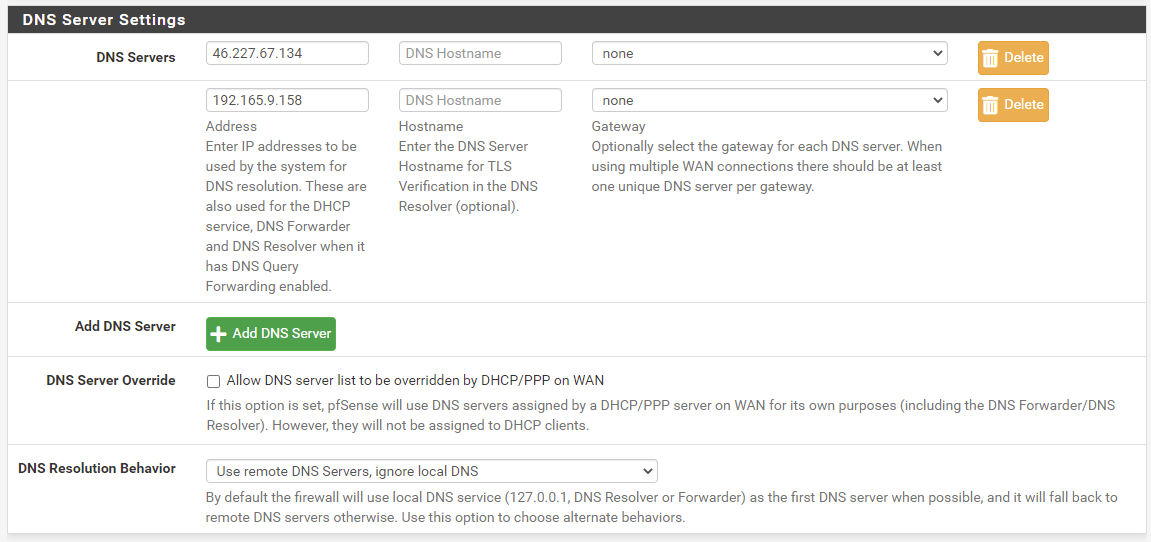
Save the changes.
2. Create CA certificate
Navigate to System → Certificate. Navigate to Authorities tab.
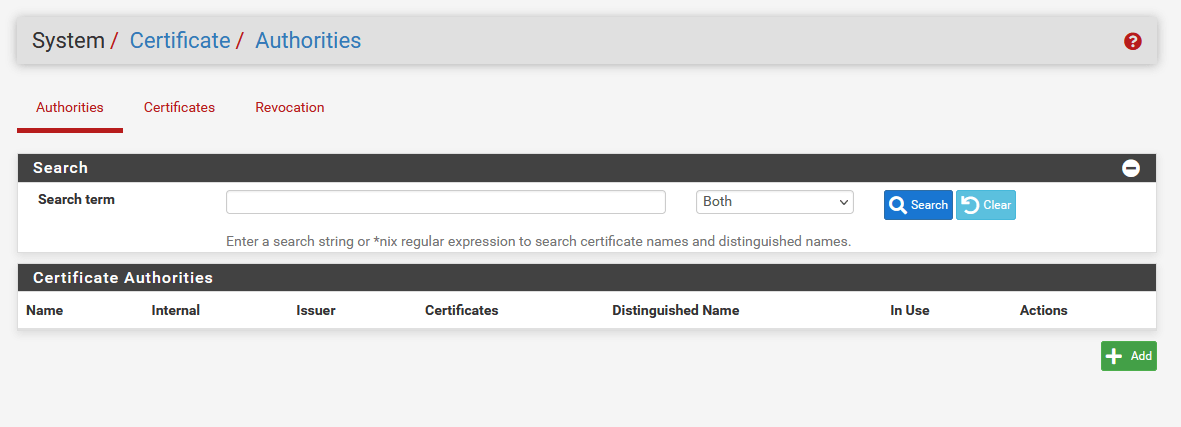
Click on +Add. Afterwards, alter these settings:
Create/Edit CA
Existing Certificate Authority
Save the changes.
Use OVPN if security is of importance
Your privacy and security is the core focus of OVPN. That's why we've implemented a multi-layered security model.
Learn more3. Choose how you want to connect to OVPN
4. Configure OpenVPN
Navigate to VPN → OpenVPN. Afterwards click on tab Clients.
Click on +Add. Afterwards, alter these settings
General Information
Mode configuration
Endpoint Configuration
User Authentication Settings
Cryptographic Settings
Tunnel Settings
Ping Settings
Advanced configuration
Save the changes.
5. Create OpenVPN interface
Navigate to Interfaces → Assignments.
Click on the plus (+) icon to create interface ovpnc1 (OVPN client). Afterwards, click on OPT1.
Select, so that Enable interface is checked.
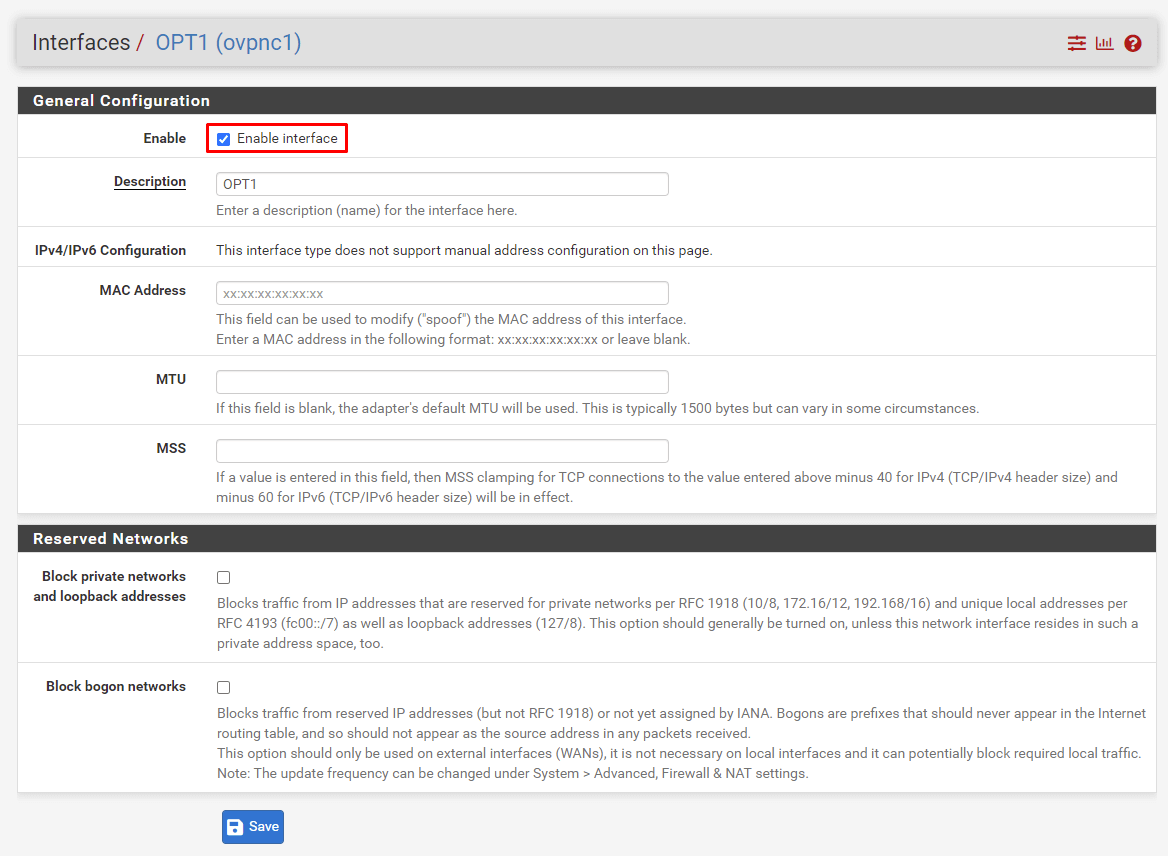
Save your changes and click on Apply changes.
6. Configure NAT
Navigate to Firewall → NAT. Afterwards click on tab Outbound
Select, so that Manual Outbound NAT rule generation (AON - Advanced Outbound NAT) is checked. Save your changes and click on Apply changes. 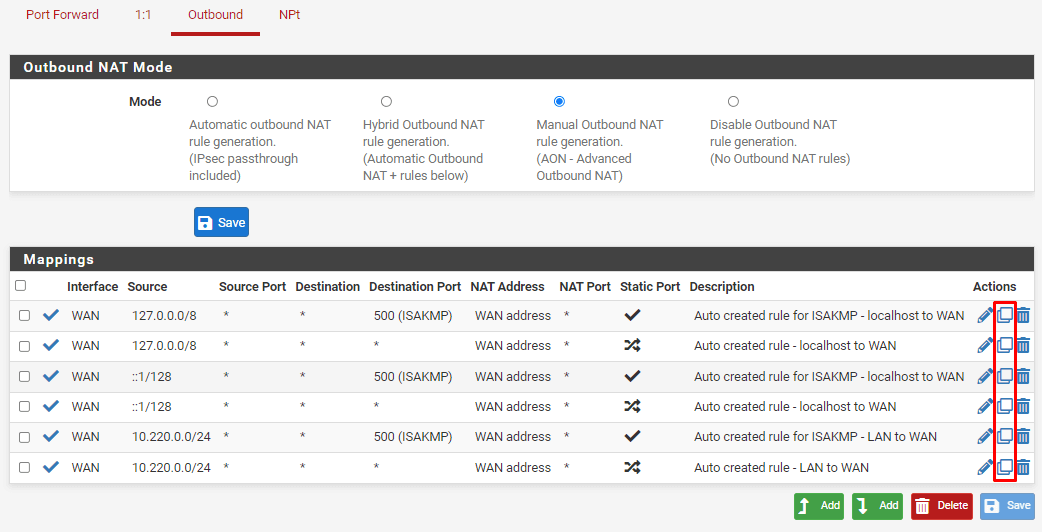
The next step is to duplicate all existing rules, but changing the interface to OpenVPN. To duplicate a rule, click on the duplicate icon (the middle icon) next to the rule
Change Interface to OpenVPN. You should also alter the Description in order to clarify that the rule is for OpenVPN. Save your changes. 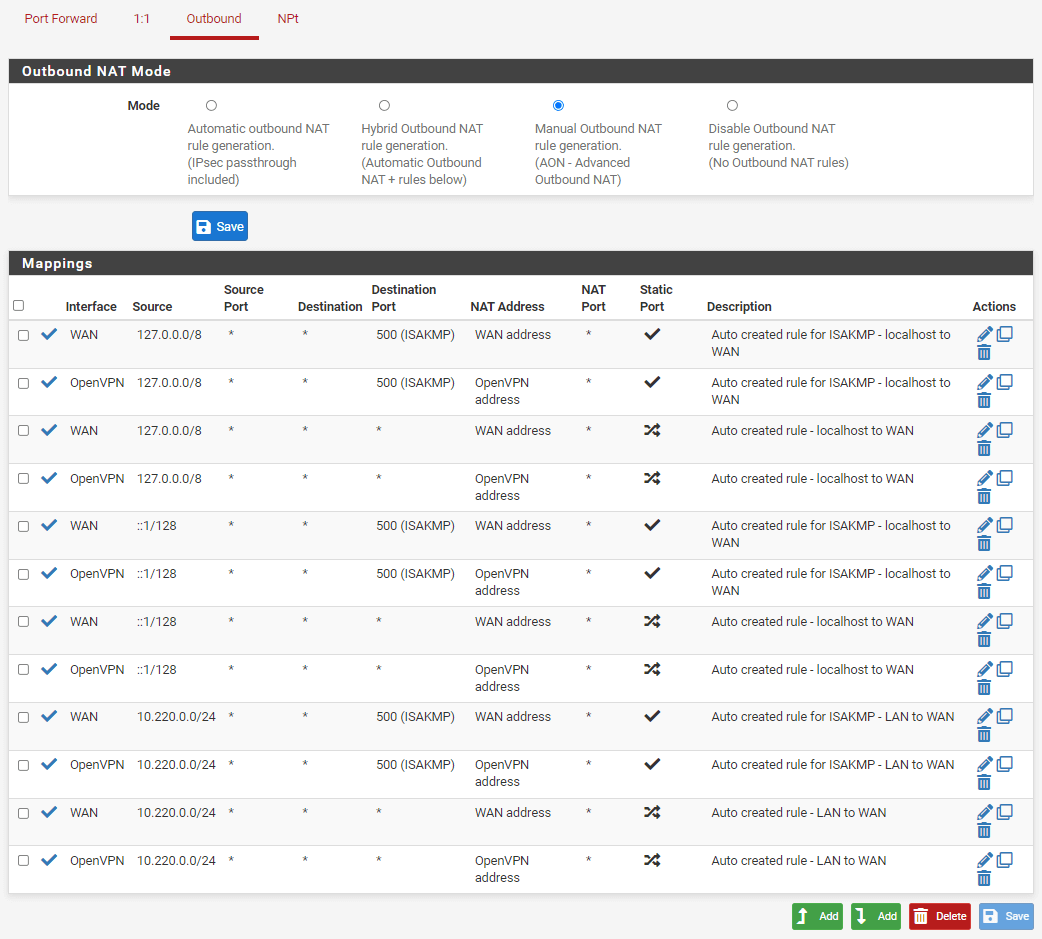
When all the rules have been duplicated, commit your changes by clicking on Apply changes.
7. (Optional) Route through the VPN
As an optional setting, you can set the VPN connection as the default gateway. By doing that, if the VPN connection goes down, it won't switch back to the WAN connection, acting as a sort of killswitch.
Navigate to System → Routing. Navigate to Gateways tab.
Under Default gateway, make the following changes:
8. Start OpenVPN
Navigate to Status → OpenVPN
Click on the icon that looks like a Play button in order to start OpenVPN. If OpenVPN is already running, we suggest restarting it.
9. Finished
You should now be connected to OVPN and be able to browse the internet safely. To make sure everything was set up correctly, please check the dashboard to verify that you are connected.