
Install WireGuard on GL-iNet
1. Generate the config(s) you want
2. Configure WireGuard
Navigate to VPN → WireGuard client
Click on Set up WireGuard manually
A new window will pop up. Click on Configuration. Copy and paste the following text into the text window:
Click on Next 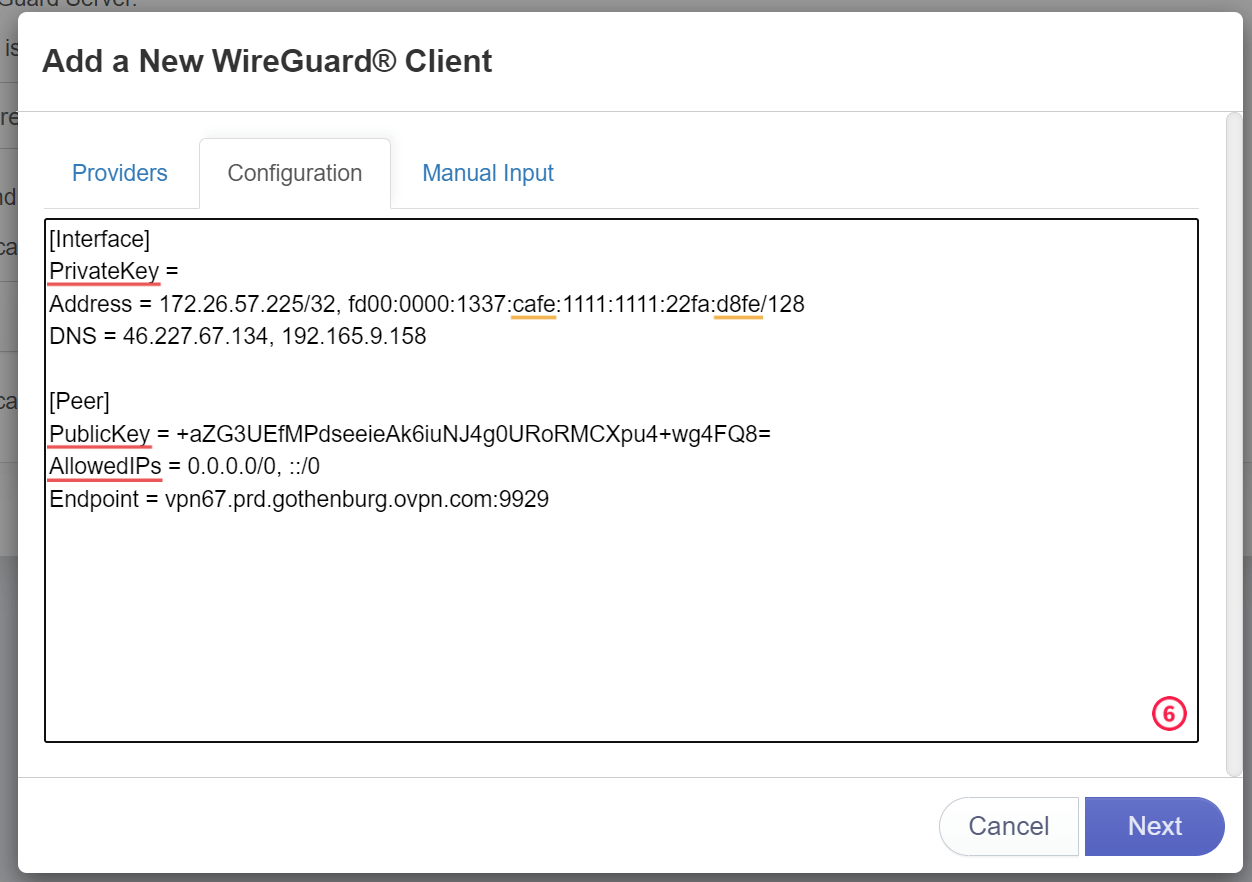
Enter the connection name into the Name field 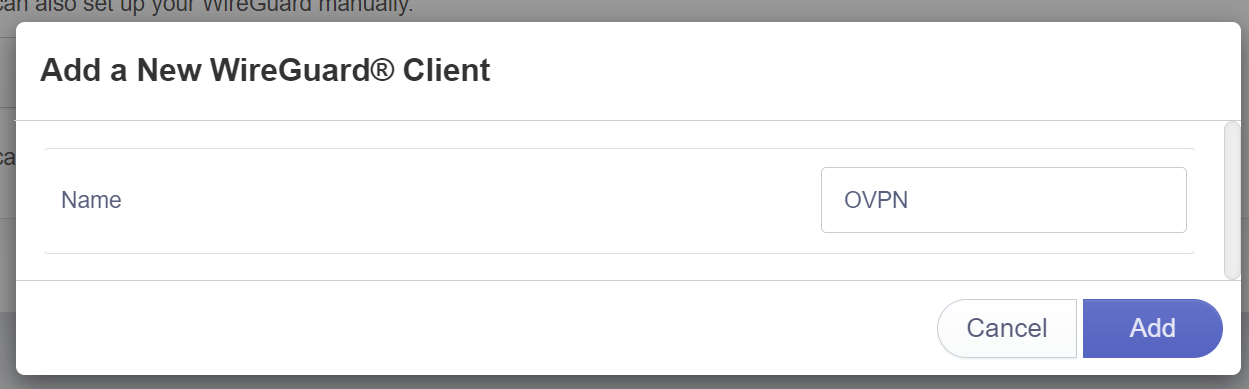
Total infrastructure ownership
All the hardware used to operate OVPN is owned by us. All VPN servers operate without hard drives as the operating system only resides in RAM.
Learn more3. Change DNS servers
Navigate to More settings → Custom DNS Server
Make sure DNS Rebinding Attack Protection is enabled
Make sure Override DNS Settings for All Clients is enabled
Make sure DNS over TLS (CloudFlare or NextDNS) is disabled
Make sure Dnscrypt-Proxy Settings is disabled
Make sure Manual DNS Server Settings is enabled
In the DNS1 Server1 and DNS Server2 fields, enter the following information:
- 46.227.67.134
- 192.165.9.158
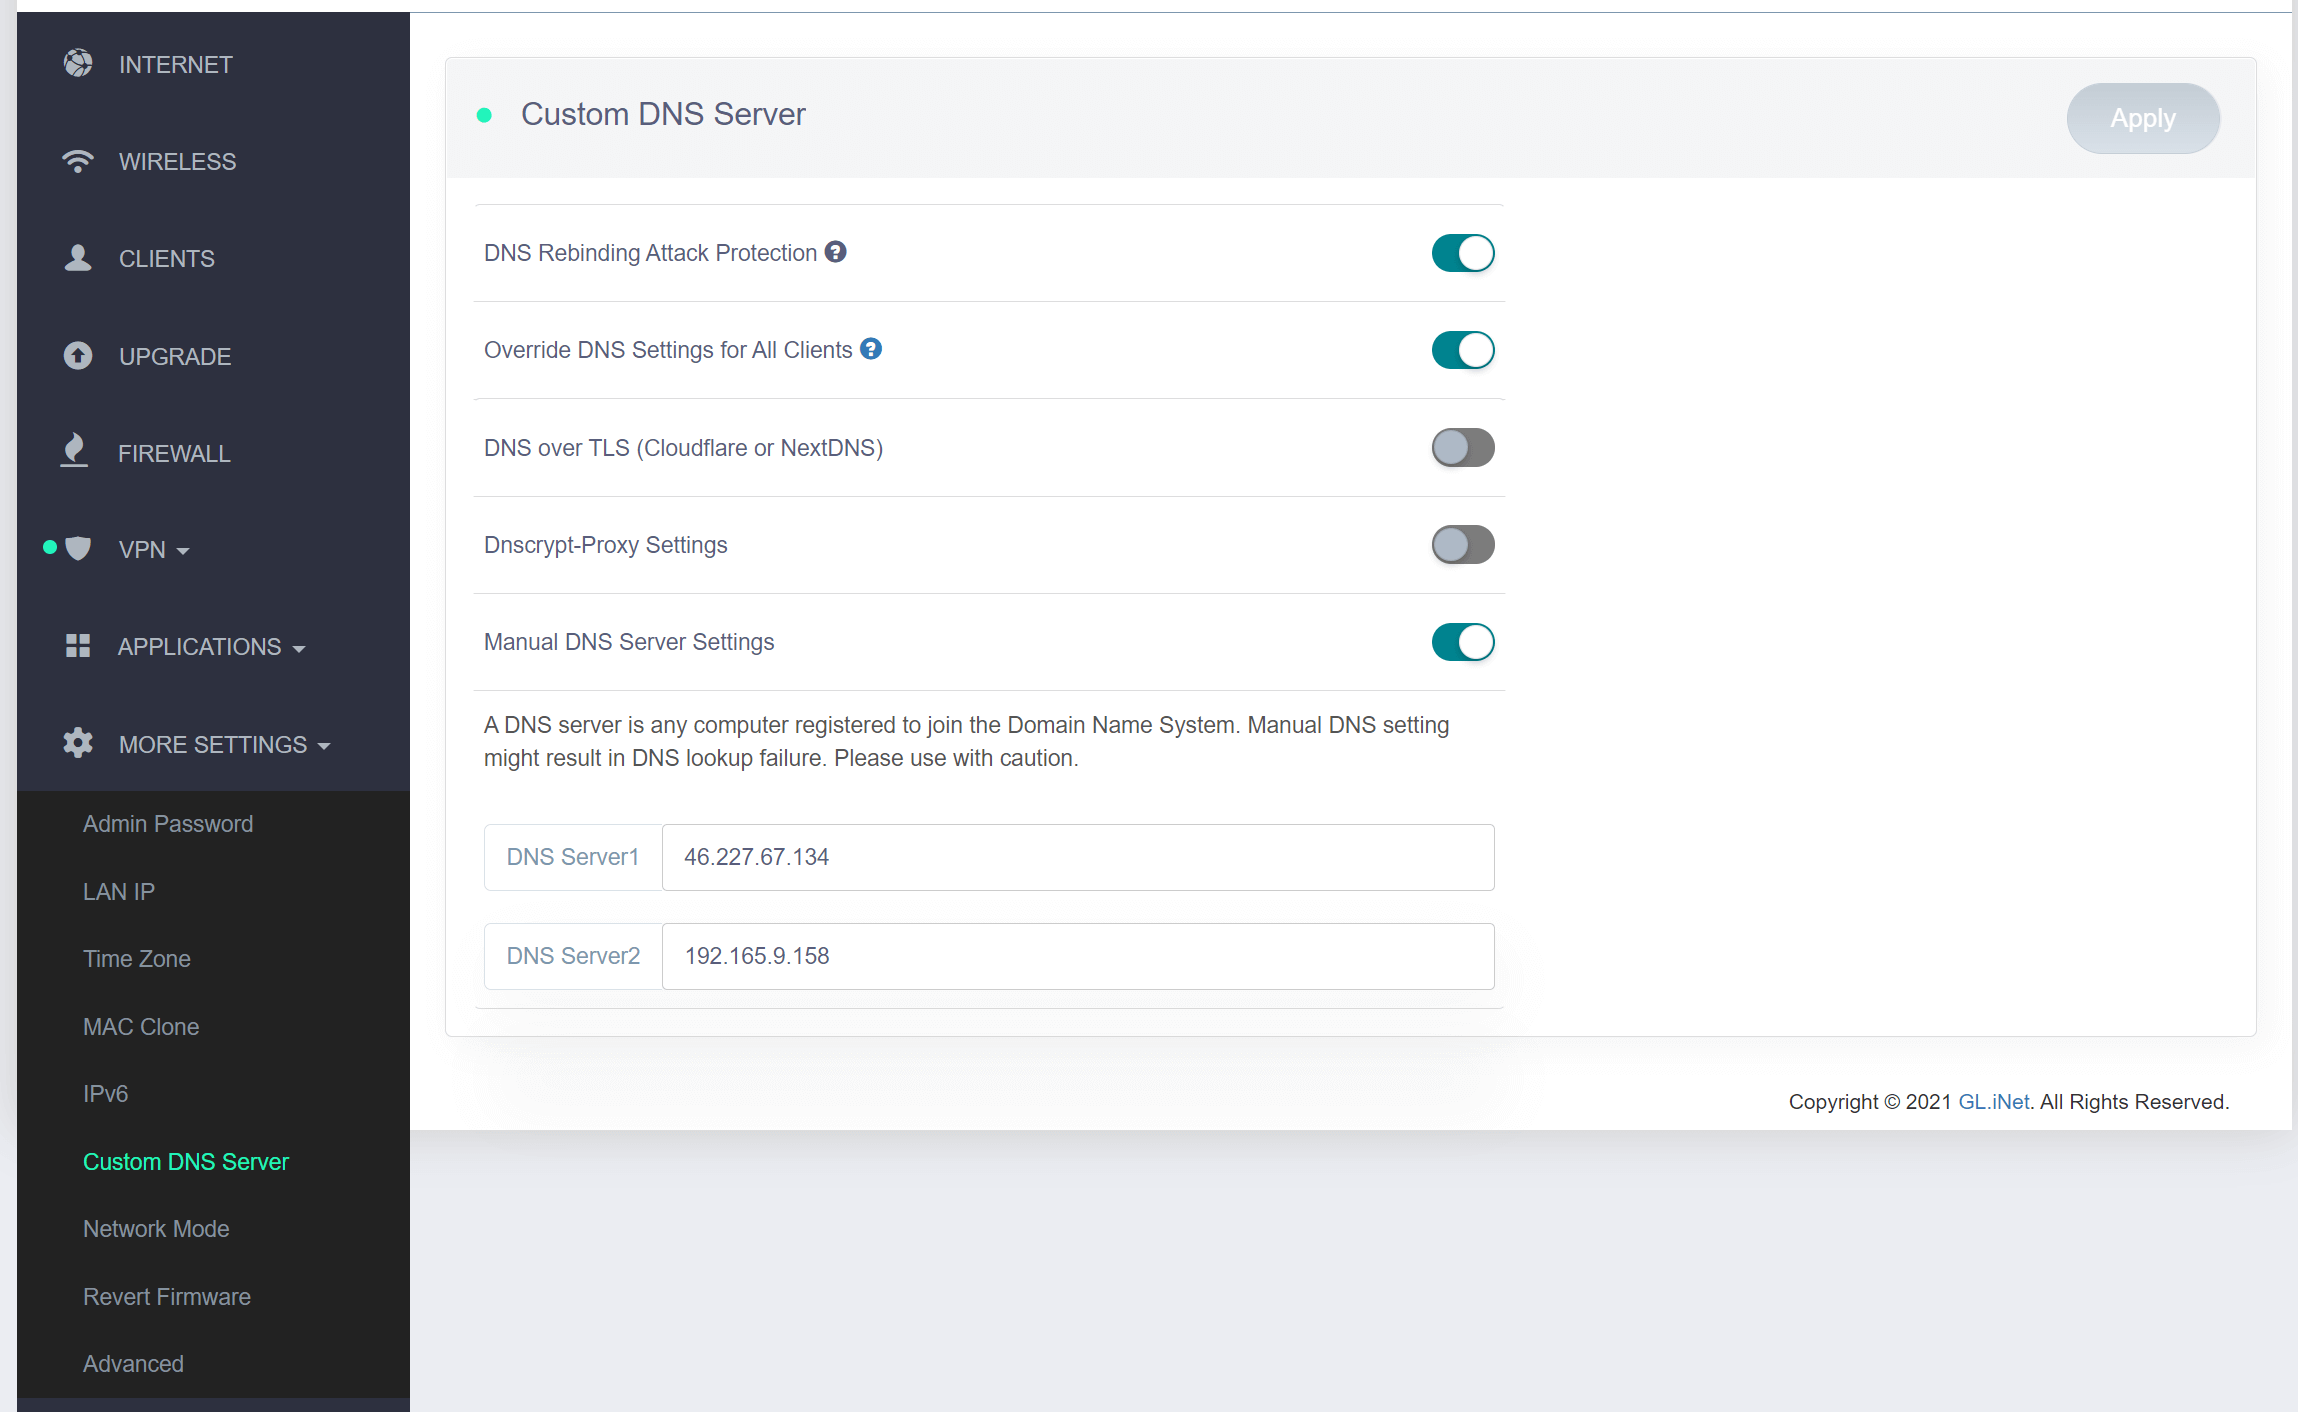
Click on Apply
4. Connect to OVPN
Navigate to VPN → WireGuard client
To connect, select the WireGuard profile you configured in step 2 and click Connect
If everything went well, an IP address should appear in the IP Address field, and the status of the
WireGuard Client should turn green. 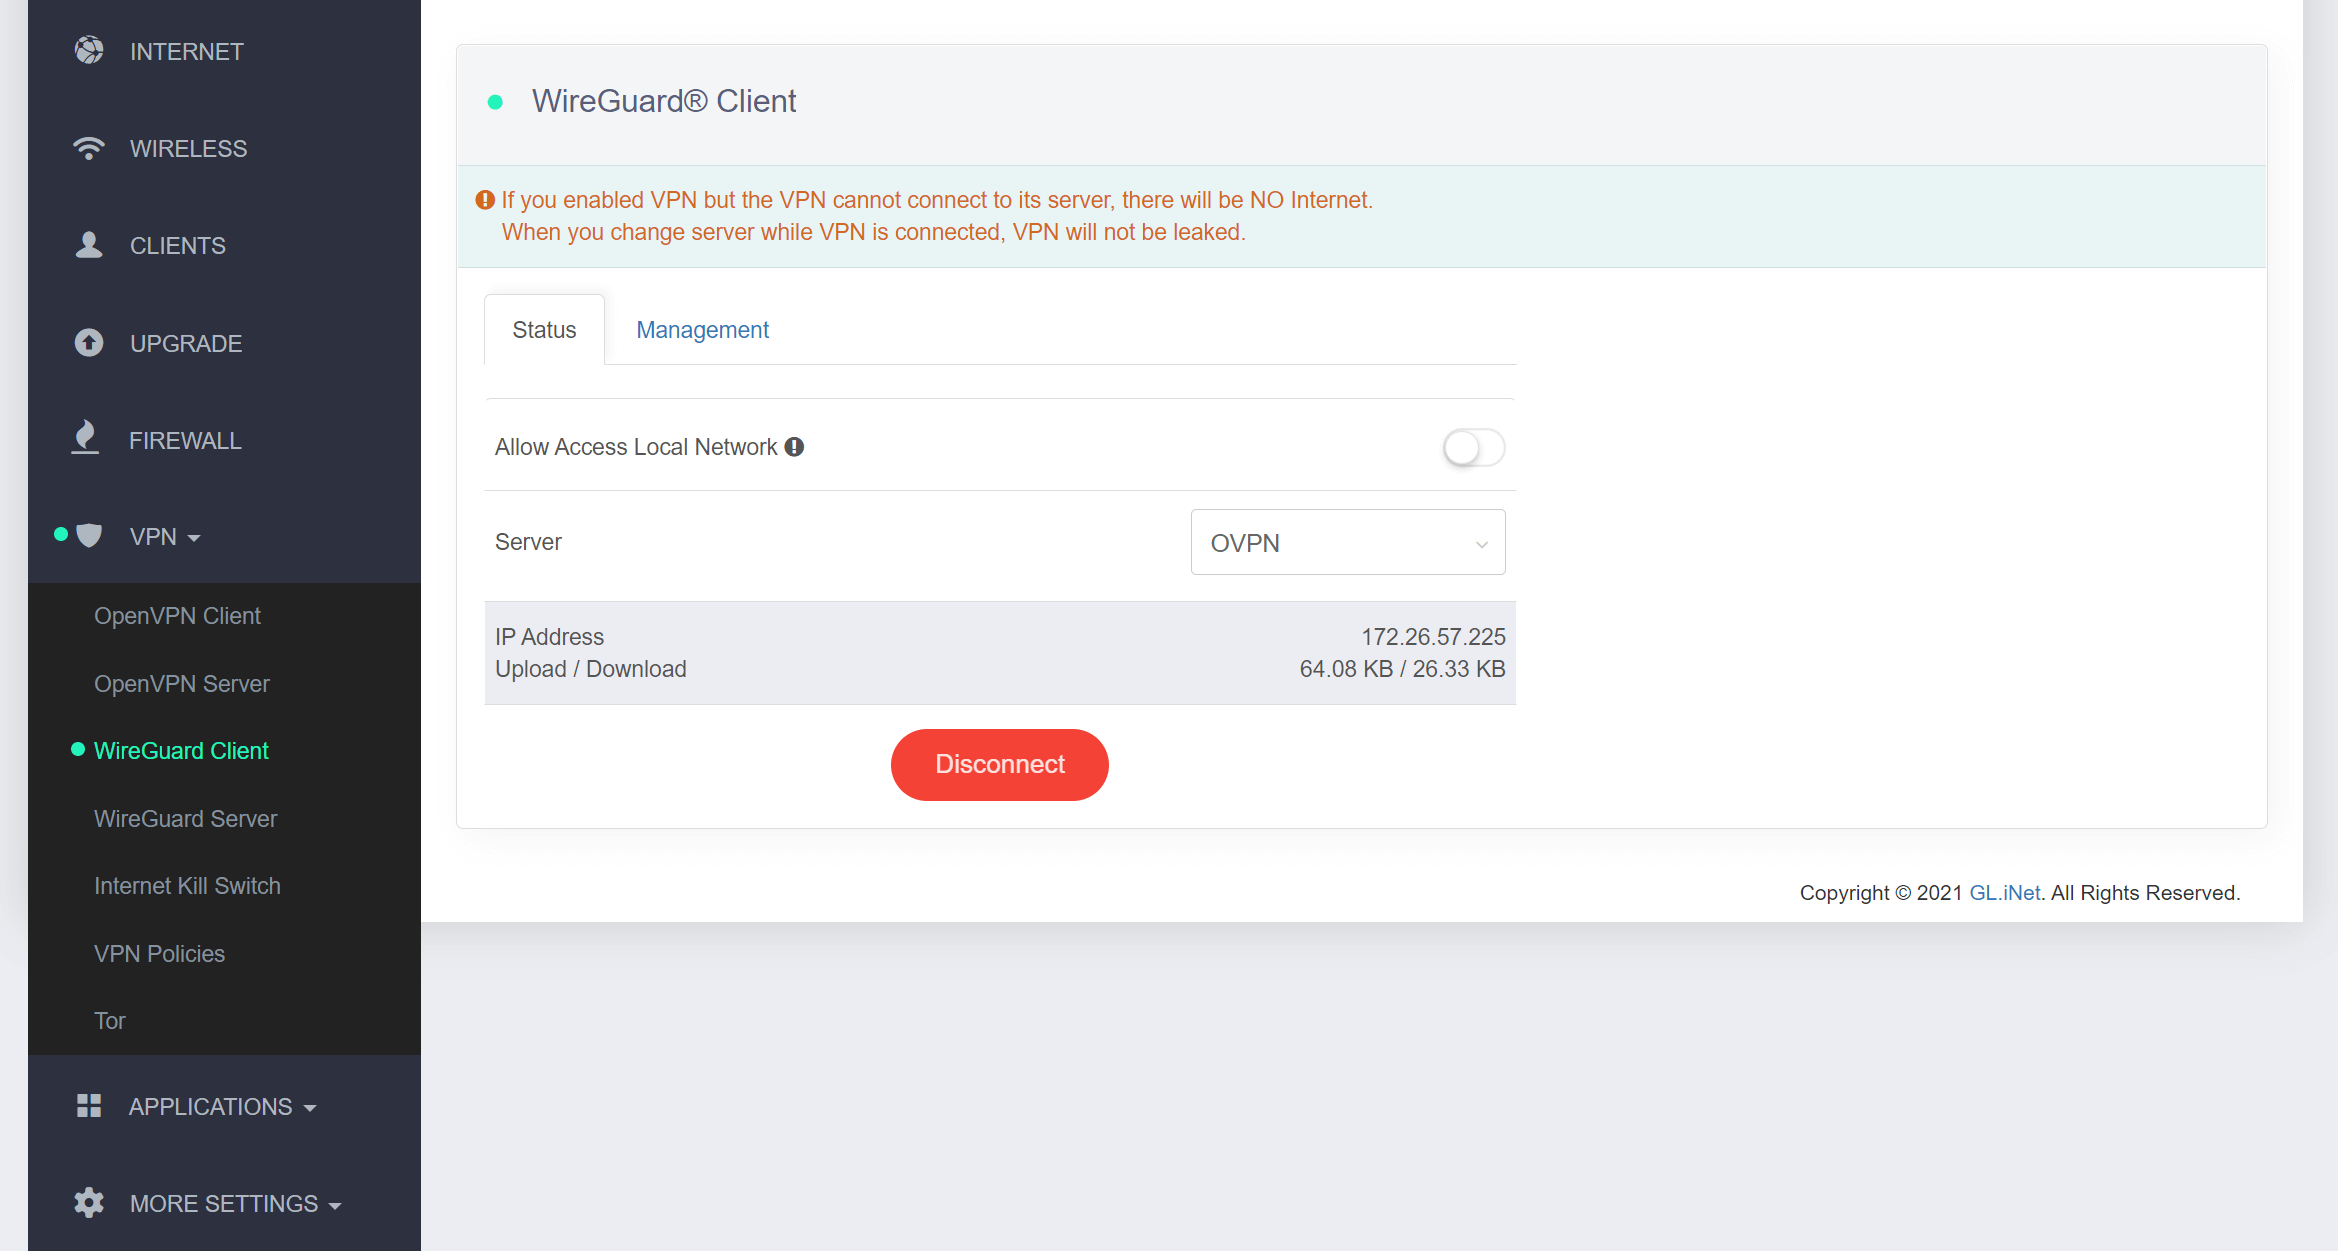
5. Verify that the connection was successful
You should now be connected to OVPN and be able to browse the internet safely. To make sure everything was set up correctly, please check the dashboard to verify that you are connected.